
This chapter will provide a general outline and instruction for the various role-specific workflows including the author, reviewer, and editorial team.
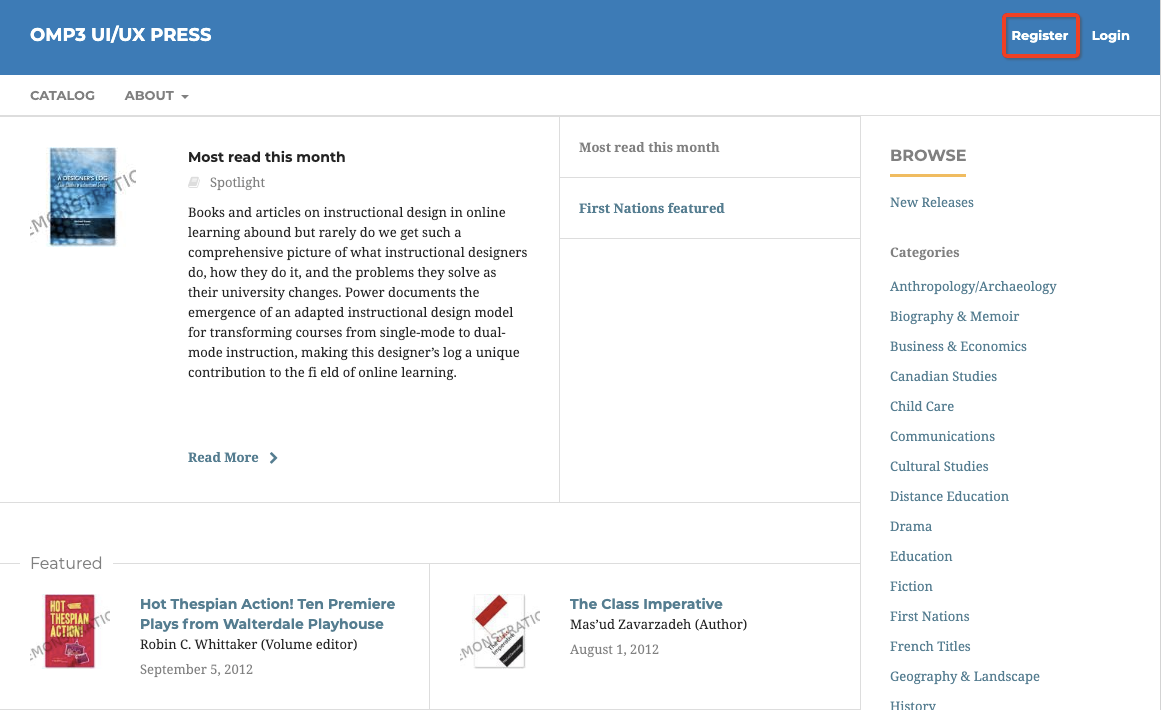
To create an account in a Press, click Register on the Press’ homepage. This is typically found on the top-right corner of the Press’ site.
Enter all of the required information on the registration form as indicated by the red asterisk and agree to the terms and conditions.
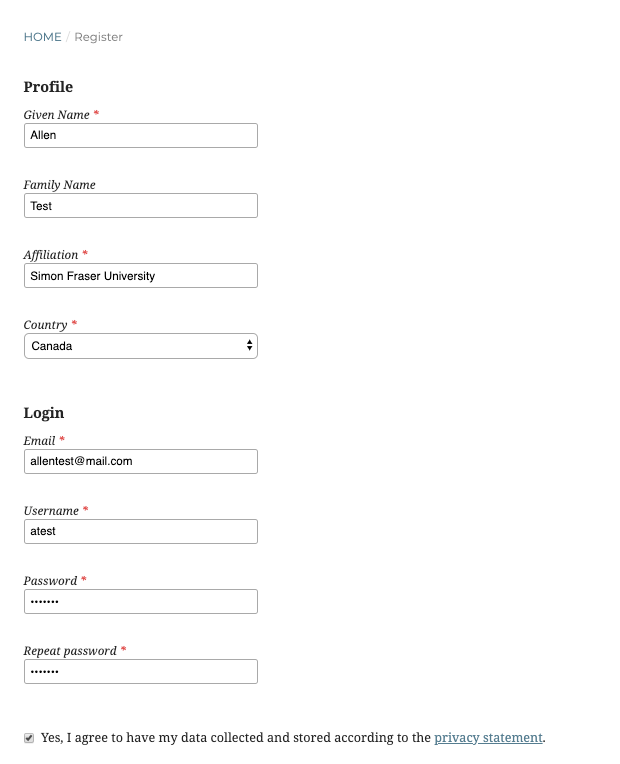
Once you have completed the form and agreed to the terms, click register. After completing the registration you’ll be able to submit a manuscript, edit your profile, and continue browsing.
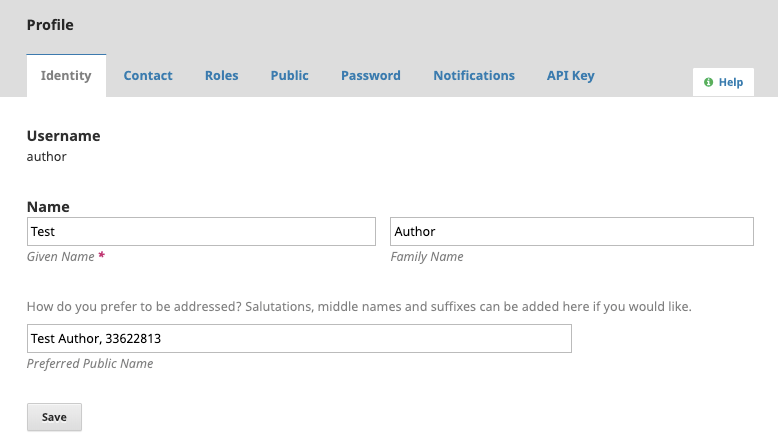
Once logged in you will be able to edit your user profile by clicking your username on the top-right corner of your dashboard.
Select View Profile

From here, you’ll be able to edit your name, contact information, signature, and public profile; change your password; set notification preferences; etc.
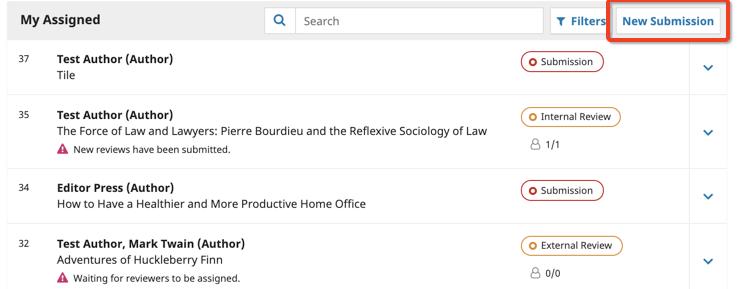
Once you are ready to make a submission, click New Submission on your user dashboard.
Step 1: Prepare
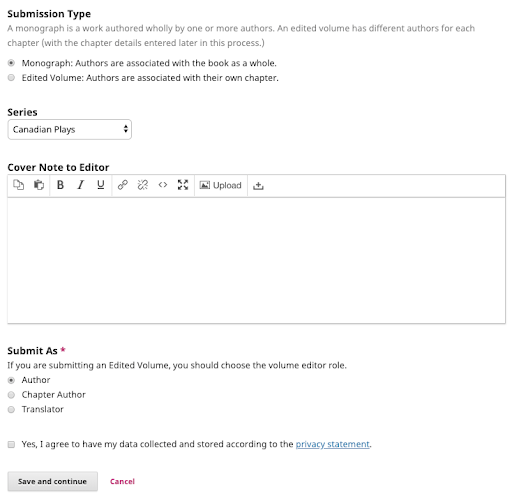
You will need to select the Submission Type, Series, the Role in submission, and add notes to the Editor (if applicable).
Once you have completed this form, click agree to the terms and click Save and continue.
Step 2: Upload Submission
Identify your Submission Component from the list. Once selected, upload your file.
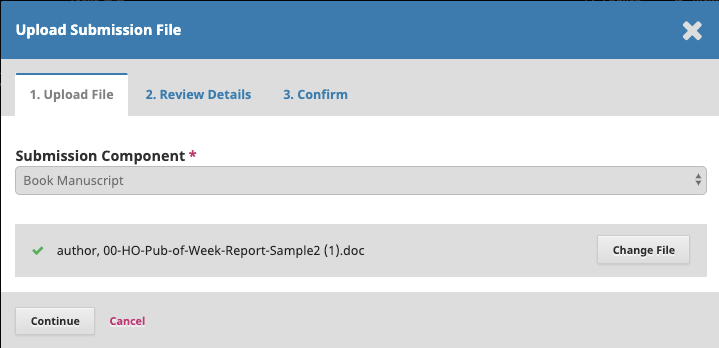
Press continue.
You can upload additional documents (as applicable).
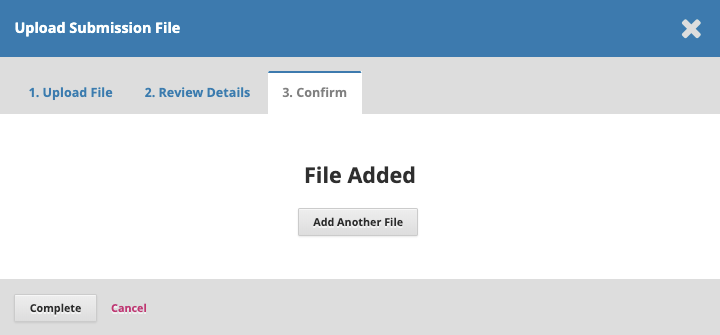
Press Complete followed by Save and Continue.
Step 3: Catalog
You will need to enter the following metadata regarding your manuscript. Items marked with the red asterisk are a mandatory part of the submission.
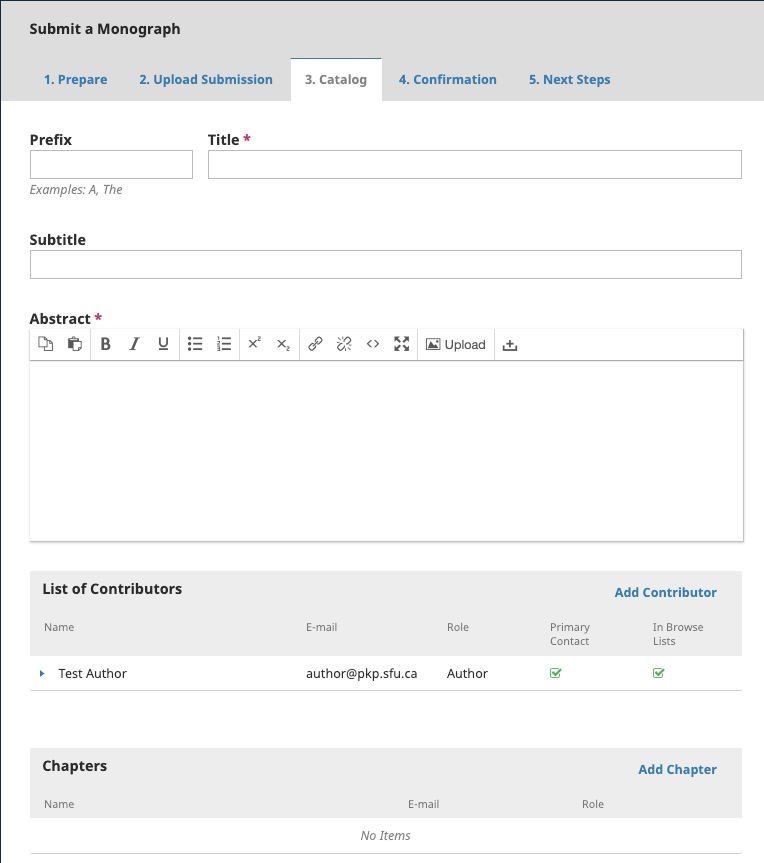
Enter your manuscript’s Title, Subtitle, Abstract, List of Contributors, Chapters, Additional Refinements Subjects, and Keywords as applicable.
For the List of Contributors, you will need to fill in the required information: Name, Email, Country, and Contributor’s Role.
You will need to select who will be the principal contact for the submission and whether their name will appear in the browse list on the press.
Once you have completed the form, click Save and Continue.
Step 4: Confirmation
Once you have completed all the steps, click Finish Submission.
Reviewer requests will appear in their user dashboard and in the taskbar. The request will have the Response and Review deadline.
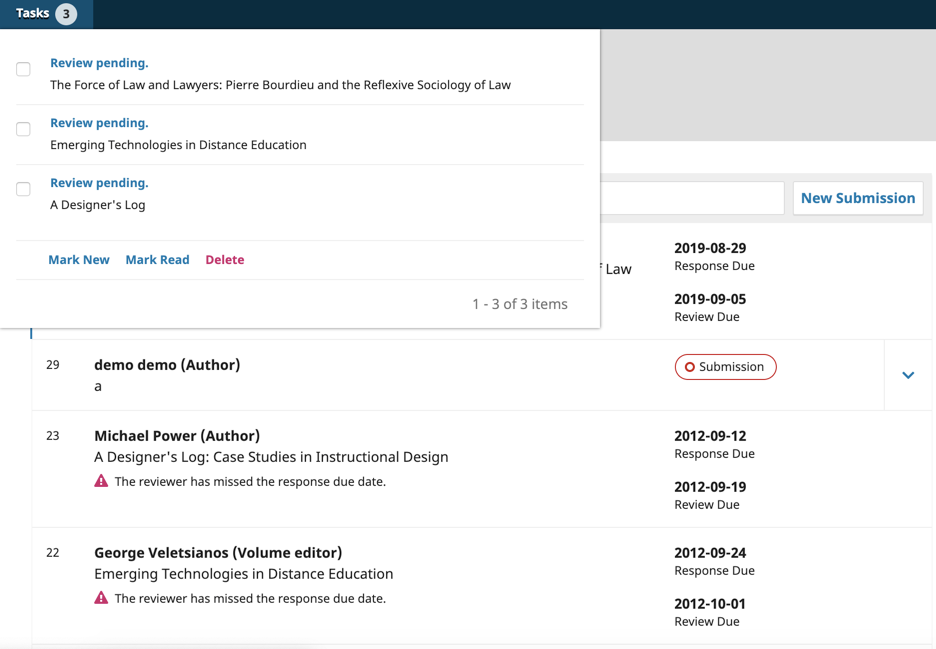
A reviewer can see more details regarding the request by clicking on the manuscript. The request submenu will have the general information regarding the submission, the review file, and additional submission details and review schedule.
The information in the View All submission Details will vary depending on your review policy.

The reviewer’s option to accept or decline the review request will be at the bottom of this page. Once the reviewer accepts the request, they will have access to the remaining tabs.
The second tab will outline the press’ reviewer guidelines. The third tab will have the review file for download and text boxes for the reviewer to enter their comments to the author and editor or editor only. They can also upload files for the author or editor, as well as start discussions with the editor. The reviewer can submit the review at the bottom of this page. After the review has been submitted, the reviewer still has the option of starting a discussion with the editor.
Once a manuscript has been submitted, the Editor will review the submission to determine its suitability.
The submitted manuscript will appear in the Editor’s My Queue or Unassigned. The Editor will select and download the Manuscript.
After reviewing the manuscript, the Editor can decide to Accept and Skip Review, Decline Submission, or send it through Peer Review. The Editor can either assign a Series Editor or undertake the review process themselves.
The assigned Editor will then decide whether they will send the manuscript for Internal or External Review.
As an editor, you can choose to conduct an Internal Review followed by an External Review or choose to move straight to peer review; each of these optional stages involves its respective set of reviewers.
As an editor, you can initiate the internal review process for an assigned submission by choosing the Internal Review option on the monograph’s Submission page. By sending the manuscript for Internal Review, other Editors can review this manuscript.
You will be prompted to select the submission files the author provided for inclusion in the review process, and you can optionally upload new files or revise existing files. Once you have selected the appropriate files, you can select to send the manuscript to review.
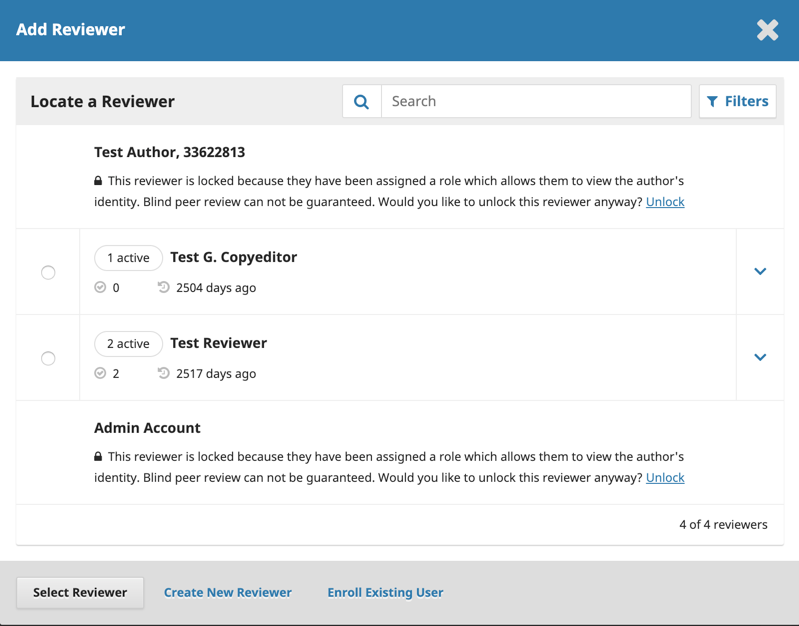
Once the Internal Review has been prompted on your dashboard, you will need to select reviewers by clicking Add Reviewer in your main menu subpanel.

You can select a reviewer from the reviewers in your journal, create a new reviewer, or enroll an existing reviewer from another journal within a multi-journal installation.
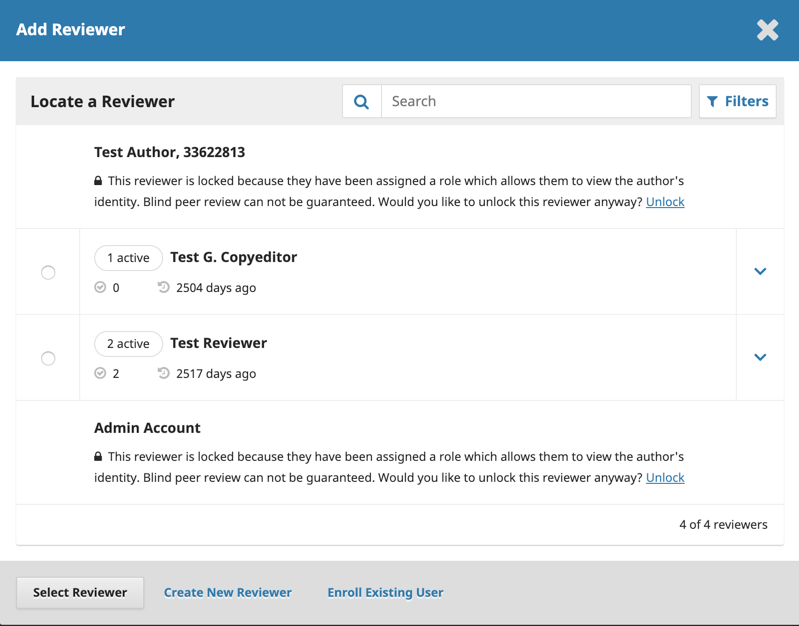
At this stage, reviewers associated with the press evaluate the submission. In an Open or Blind review, an editor can contact reviewers as well as revise their due dates by clicking the icon next to their names.
You will be notified of completed reviews and can access the reviews by clicking the arrow beside the reviewer’s name and selecting Email Reviewer in the Reviewers section.
Once all the reviews are in, you must make a decision on the submission. Options are the following:
These selections are found on the right panel in the Internal Review menu.
The external review process can be initiated at the end of the internal review process by choosing the Send to External Review or at the time of initial triage. Similar to the Internal Review, you will be prompted to select the submission files the author provided for inclusion in the review process, and you can optionally upload new files or revise existing files. Once you have selected the appropriate files, you can select to send the manuscript to review.
Once the External Review has been prompted on your dashboard, you will need to select reviewers by clicking Add Reviewer in your main menu subpanel.

You can select a reviewer from the reviewers in your journal, create a new reviewer, or enroll an existing reviewer from another journal within a multi-journal installation.
At this stage, reviewers associated with the press evaluate the submission. In an Open or Blind review, an editor can contact reviewers as well as revise their due dates by clicking the icon next to their names.
Once the review has been completed you will be notified. As an editor, you can access the reviews by clicking on the reviewer’s name in the Reviewers section.
All author, reviewer, and editor revision files are available from the Revisions section. Only documents included in this section will be available to be moved to later workflow stages.
Once all the reviews are in, you must make a decision on the submission. You may select one of the following:
Request Revisions, in which case the author will be able to modify their submission information and/or upload revised submission files
Decline Submission, at which point the submission will be archived and the author notified
Accept Submission, at which point the submission will enter the Editorial stage
These selections are found on the right panel in the Internal Review menu.
Please refer to the Copyediting section of Learning OJS.
Following the Copyediting stage, the manuscript enters the Production stage.
Whereas the production stage is generally initiated after the copyediting stage has been completed, the Editor may choose to add information as it becomes available earlier in the workflow process.
At the production stage you can review, edit, and finalize the information of the manuscript — including key metadata, abstract, category, contributors, chapters, submission type, permissions, the cover image, and identifiers and other metadata — by clicking Catalog Entry.
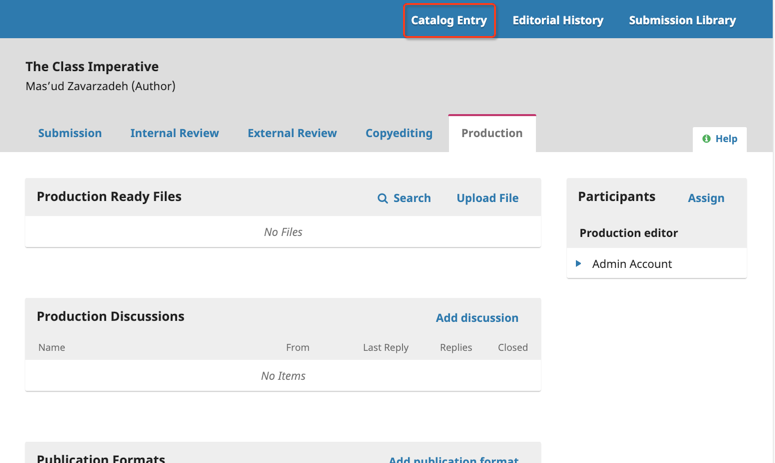
You will also upload the publication format(s) in the Production stage. Various book formats including audio, digital, hardback, paperback/softback can be configured, and proofs can be uploaded for auditing and final editorial approval. Publication Formats will be explained in greater detail below.
Once the proofs are approved and the catalog information is checked and approved for publishing, the book is published online. Terms for downloading monographs can be set.
The production stage is used to create and manage publication formats (e.g., Digital, Hardback, Paperback/ Softcover), final publication-ready versions of the submission, and the catalog itself. This process is usually managed by a production editor with the input and assistance of designers and proofreaders. Production Editors and other users can be assigned using the Participants menu.
All approved and copyedited submission files from the editorial stage are available in the Production Ready section, and additional files can be added if need be.
Books can be published on your public OMP press site in a variety of formats, including HTML, PDF, and EPUB. These files must be uploaded during the Production stage as publication formats. You can also create publication formats for physical hardcover and paperback copies of the book.
The publication files must be prepared outside of OMP by a typesetter, graphic designer, or layout editor. Once they are ready to be published, create a publication format and then upload the file.
To add a publication format:

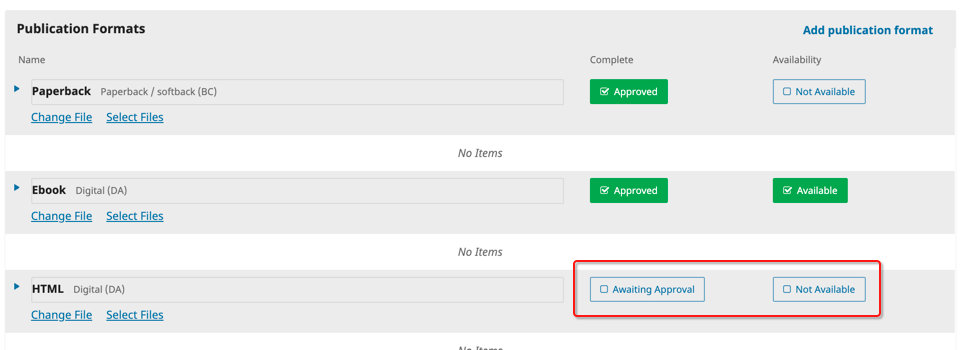
Now you will see the publication format listed. It should say it is Awaiting Approval.
To upload the file:
To add another format, follow the same steps.
You can upload multiple files for a single publication format, which you may wish to do when adding supplementary material or individual chapter files.
If you want to upload individual chapter files, you can create a publication format called Chapter Files and then upload a file for each chapter under that publication format. The separate chapter files will then be available under the metadata on the published book page.
Another option is to create a separate publication format for each chapter, but if you do that there will be links to each chapter along the right side of the book page on your website, along with the main publication formats (EBOOK, PDF, etc.).
For a manuscript to appear in the public catalog, you must approve the submission’s metadata for public display. Each publication format will have a two-step approval process.

The first checkbox, Awaiting Approval, is for editors to sign off when the publication format’s metadata is ready for publication.
The second checkbox, Not Available, is for approving the publication format for display to readers. Once this checkbox is toggled, any approved files will be shown to the user.
If a publication format has no approved files, it will not appear in the catalog.
In order for a digital edition of a book to be available for download, you must: