
The Website Settings allow you to configure how your journal’s website looks and operates. It consists of 3 main tabs for Appearance, Setup, and Plugins.
This PKP School video explains how to configure your journal’s appearance in OJS. To watch other videos in this series, visit PKP’s YouTube channel.
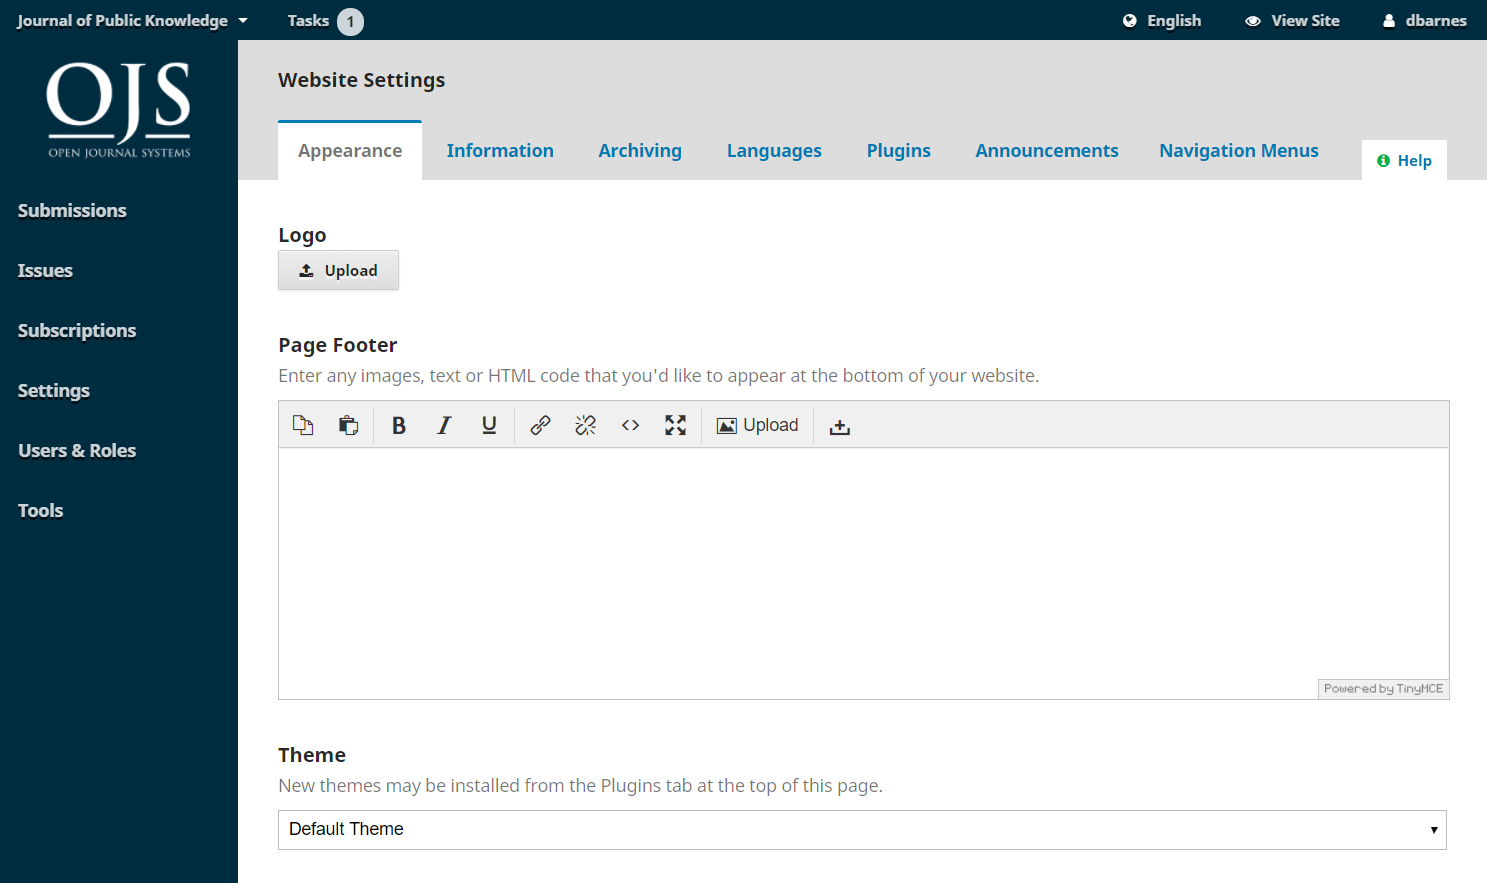
The theme determines the overall design or layout of your site. Several different theme options are available and you can try them out without affecting your site’s content or configuration.
First you can ensure that all available themes have been enabled on your site.
You can also look for additional themes in the Plugin Gallery and install and enable those.
Now that you have all available themes, return to the Appearance tab to try out different themes.
As of OJS/OMP/OPS 3.3, the Default Theme has been externally audited for accessibility and adheres to best practices like colour contrast, keyboard navigation, and form/link focus. PKP Accessibility Statement contains further details.
If you would like to make minor changes to your site’s design and layout, you can upload a Journal Stylesheet in Website Settings > Appearance > Advanced.
Typography: Quickly choose the fonts for your journal. This option may or may not be available depending on the selected theme.
Colour: Quickly change the colour of your journal’s header. This option may or may not be available depending on the selected theme.
Journal Summary: Check this off to show the journal summary on the homepage. You can add your journal summary under Journal Settings > Masthead. This option may or may not be available depending on the selected theme.
Header Background Image: Check this off if you if you want the uploaded homepage image to be shown as the header background.
For further theme customization options, consult the Designing Your Journal guide. Note that changes made to the themes may impact journal accessibility.
Where you can upload images (logo, thumbnail, homepage) to your sites main page, enter footer information, and configure your sidebar menu.
Journal thumbnail: Upload a small logo or image representative of the journal that will be used in lists of journals on this OJS installation. This will only be used on OJS installations with multiple journals.
Homepage Image: Uploading an image here will will place it on your journal’s home page.
Page Footer: Enter any images, text or HTML code that you’d like to appear at the bottom of your website.
Sidebar: This allows you to move different blocks in or out of the sidebar in the reader interface. You can also create a custom block using the Custom Block plugin
Where you can upload your journal stylesheet, Favicon, and Additional Content.
If you would like to make more significant changes to the design or give your site an entirely unique look, you can develop your own theme or child theme. Instructions are available in the PKP Theming Guide.
Journal Favicon: Add a favicon to display in the reader’s browser address bar.
Additional Content: Any text entered here will appear on your homepage.
Hit Save to record your changes.
This PKP School video explains how to configure the Information settings in OJS. To watch other videos in this series, visit PKP’s YouTube channel.
Use these fields to modify the text in the For Readers, For Authors, For Librarians pages on the journal website.
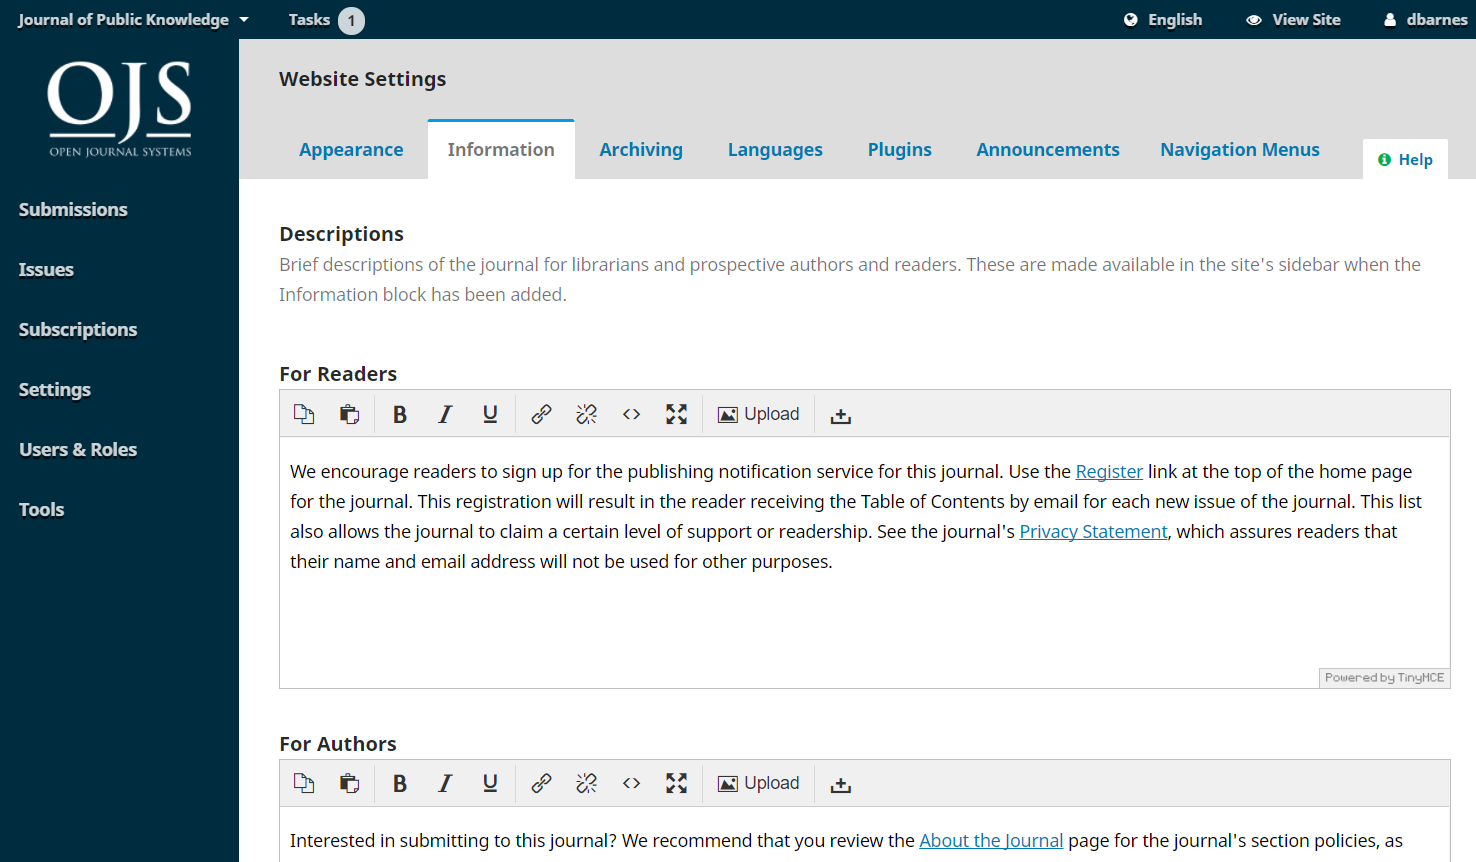
Remember to hit Save to record any changes.
To remove these fields and their contents from displaying publicly on the website’s user interface, deselect the Information Block in Website Settings > Appearance > Sidebar Management.
This PKP School video explains how to configure the Language settings in OJS. To watch other videos in this series, visit PKP’s YouTube channel.
OJS is multilingual, which means that the interface, emails, and published content can be available in multiple languages and authors can make submissions in one or more languages on a single site or journal. When you install OJS, you can select one or more languages for your site.
Under Website Settings > Languages you can see a list of languages or locales installed on your site and configure how the languages are used in your journal. Consider carefully how you want to configure and use languages in your journal because significant problems can occur if you change the settings later.
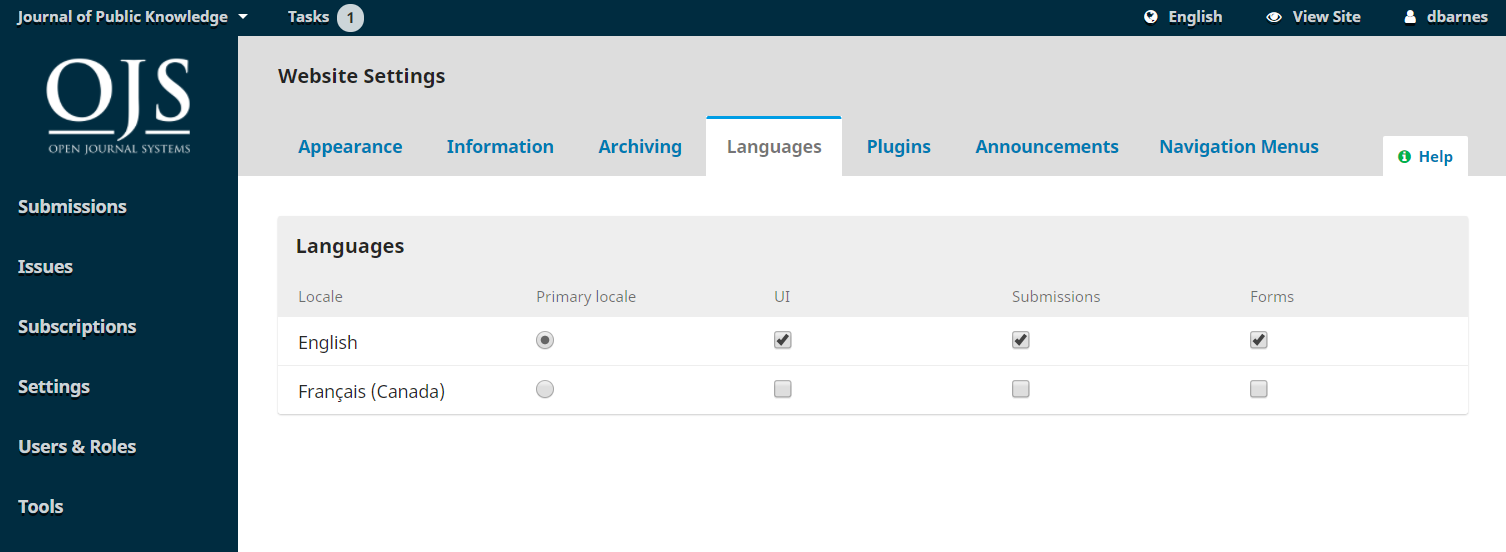
Primary Locale: One language must be set as the primary locale, which means the language the journal appears in by default.
UI: If you want the journal’s front end and back end interface to be available in other languages, select them here. Enabling a language for the UI will allow users to select the language of the application interface. For example, buttons, page titles, and on-screen messages will be in the user’s selected language.
Forms: This will enable all selected languages to be available when filling in online forms. Enabling a language for forms will allow text boxes to support multilingual data entry, including the Publication tab for submissions. For example, configuration settings and metadata can be entered in multiple languages.
Submission: If you want authors to be able to make submissions in other languages, select them here. This will allow authors to select a language when they make a submission and add metadata in selected languages when uploading their submission.
Additional languages can be installed on your site by an Administrator – see the Site Administration chapter for details.
If enabling multiple languages to appear in the UI, make sure that in Website Settings > Appearance > Sidebar Management the Language Toggle Block is selected to make that feature available to users.
This PKP School video explains how to configure the Navigation settings in OJS. To watch other videos in this series, visit PKP’s YouTube channel.
This section allows you to configure your navigation menus, such as including new links.
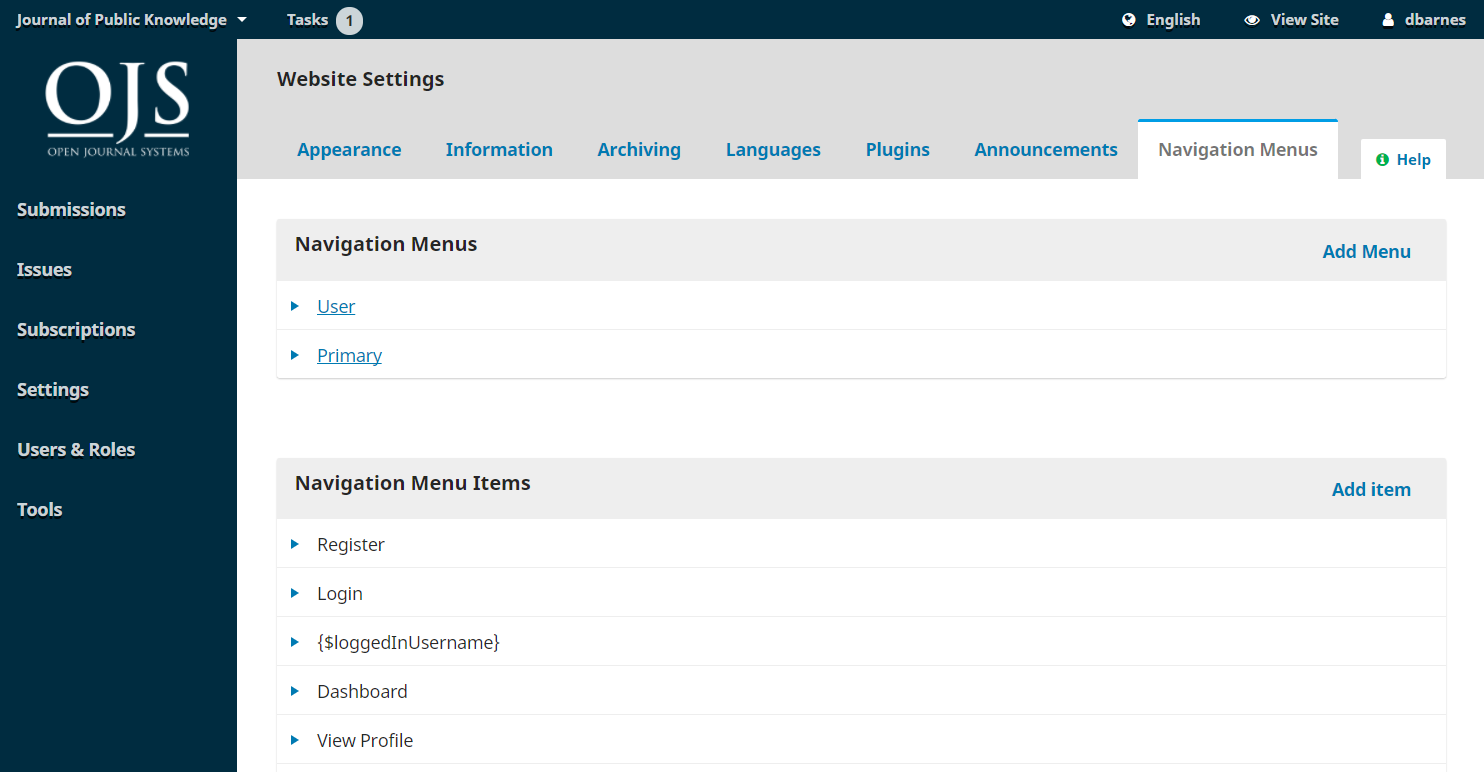
Some menu item types will only be displayed under certain conditions. For example, the Login menu item type will link to your login page, but it will only appear in the menu when your website visitor is logged out. Similarly, the Logout menu item type will only appear when a website visitor is logged in.
When you assign a Menu Item with display conditions to a Menu, you will see an icon of an eye with a slash through it. You can click that icon to learn more about when it will be displayed or hidden.
Navigation Menu Items: These are pre-programmed links you can add to the menu above, which point to pre-programmed parts of the website. You can rename any of these pages by clicking on Edit. For example, you can rename “Archives” as “Back Issues.”
Navigation Menu Items: Add Item: You can add new items to the menu. Click on Add Item and choose from the drop-down menu. In addition to the pre-programmed links, you can also add an unlimited number of custom links. There are two types of custom links:
Custom Page: If you wish to add a new webpage to OJS to the Primary Menu (e.g., “Journal History”), select Custom Page to create a static webpage. Title your new page, and choose a URL path, being careful to ensure that the path is unique. Custom pages can be used for additional content not otherwise available on your website. They must be updated manually, using the correponsponding Edit button within the Navigation Menu Items list.
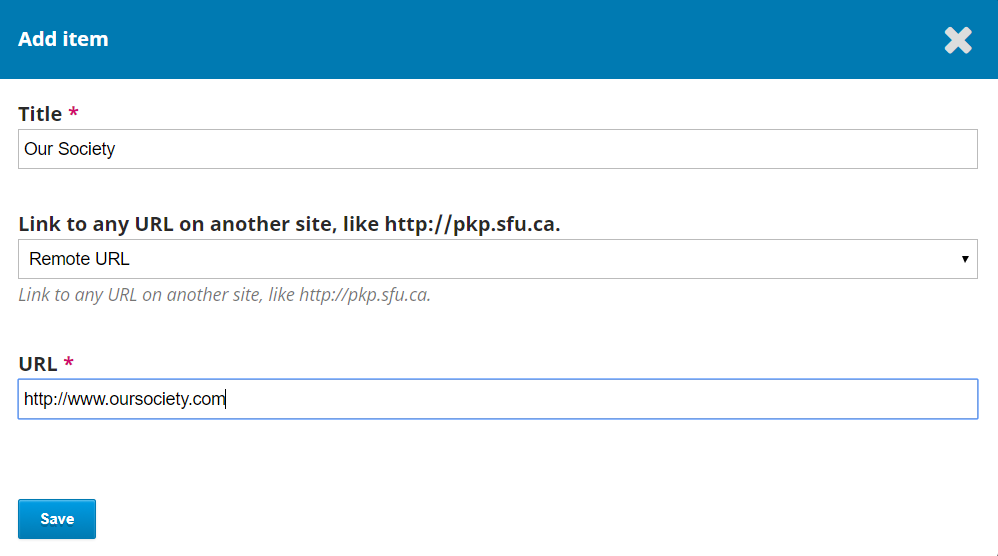
Remote URL: If you wish to add a link to an external website outside of OJS (e.g., “Our Society”), select Remote URL and insert the full URL. It is good practice to periodically check the remote URL to ensure that it remains functional.
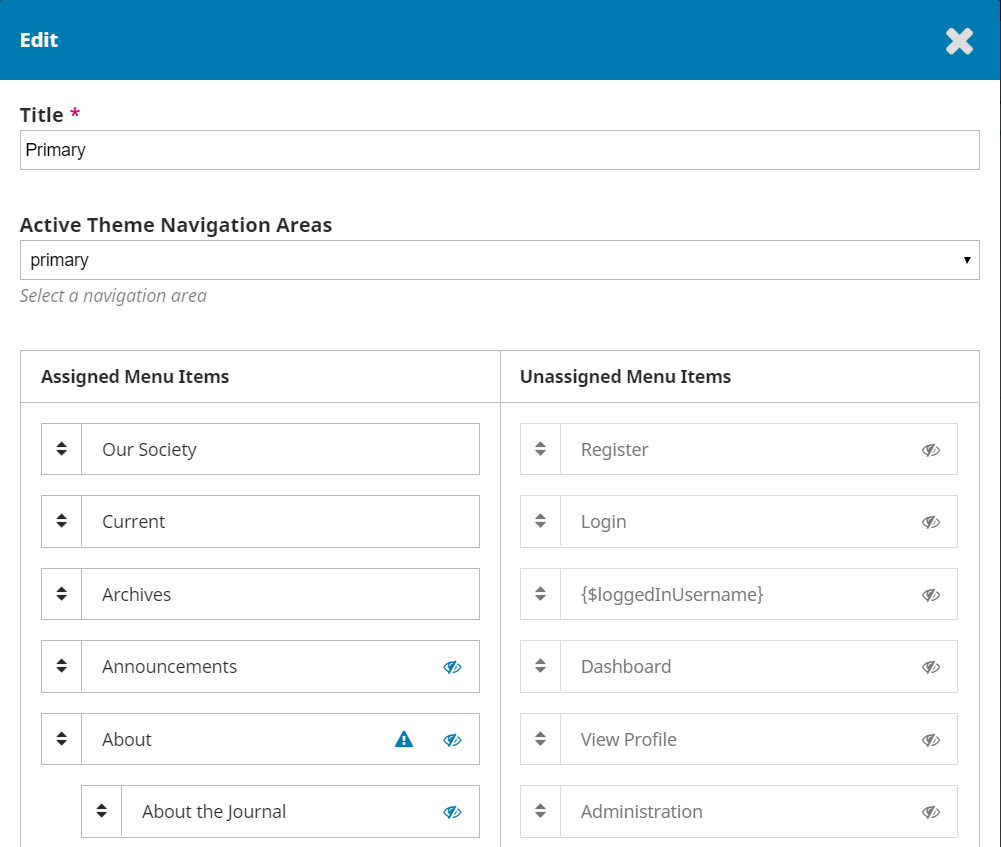
Once created, custom links will now appear in the list of Navigation Menu Items. Next, go to the desired Navigation Menu (e.g., Primary), use the blue arrow to reveal the options, and choose Edit. You can now drag and drop it from Unassigned Menu Items to Assigned Menu Items and into the appropriate location on the menu.
Hit Save to record the change.
This PKP School video explains how to configure the Announcements settings in OJS. To watch other videos in this series, visit PKP’s YouTube channel.
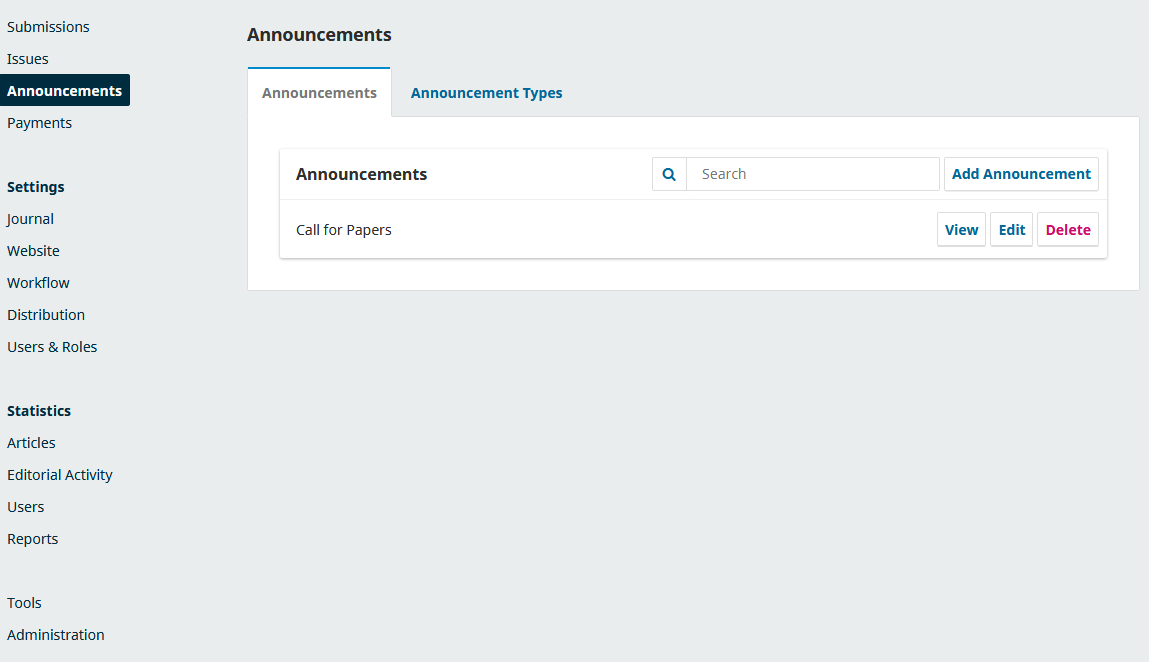
This section allows you to create and display news announcements on the journal’s website.
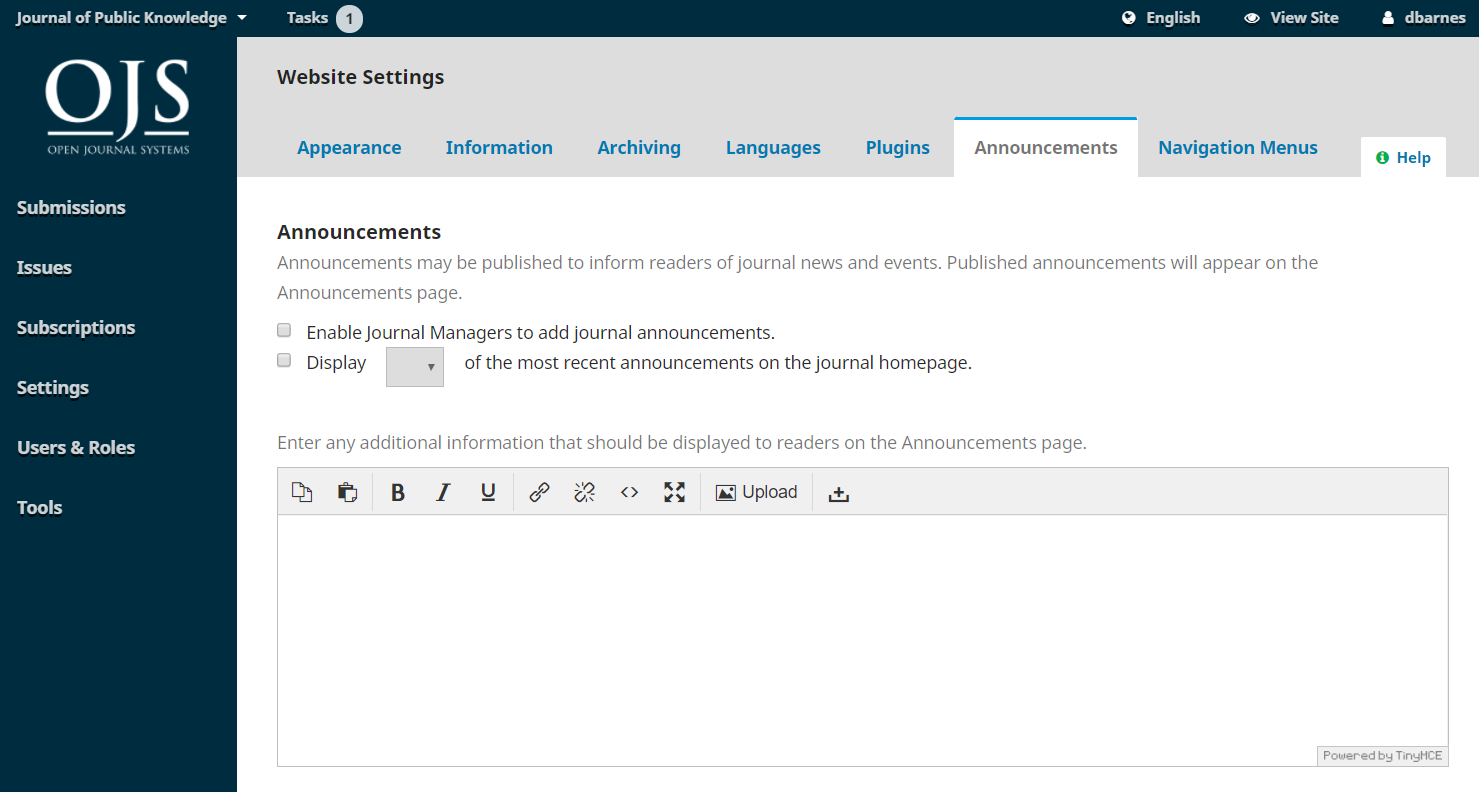
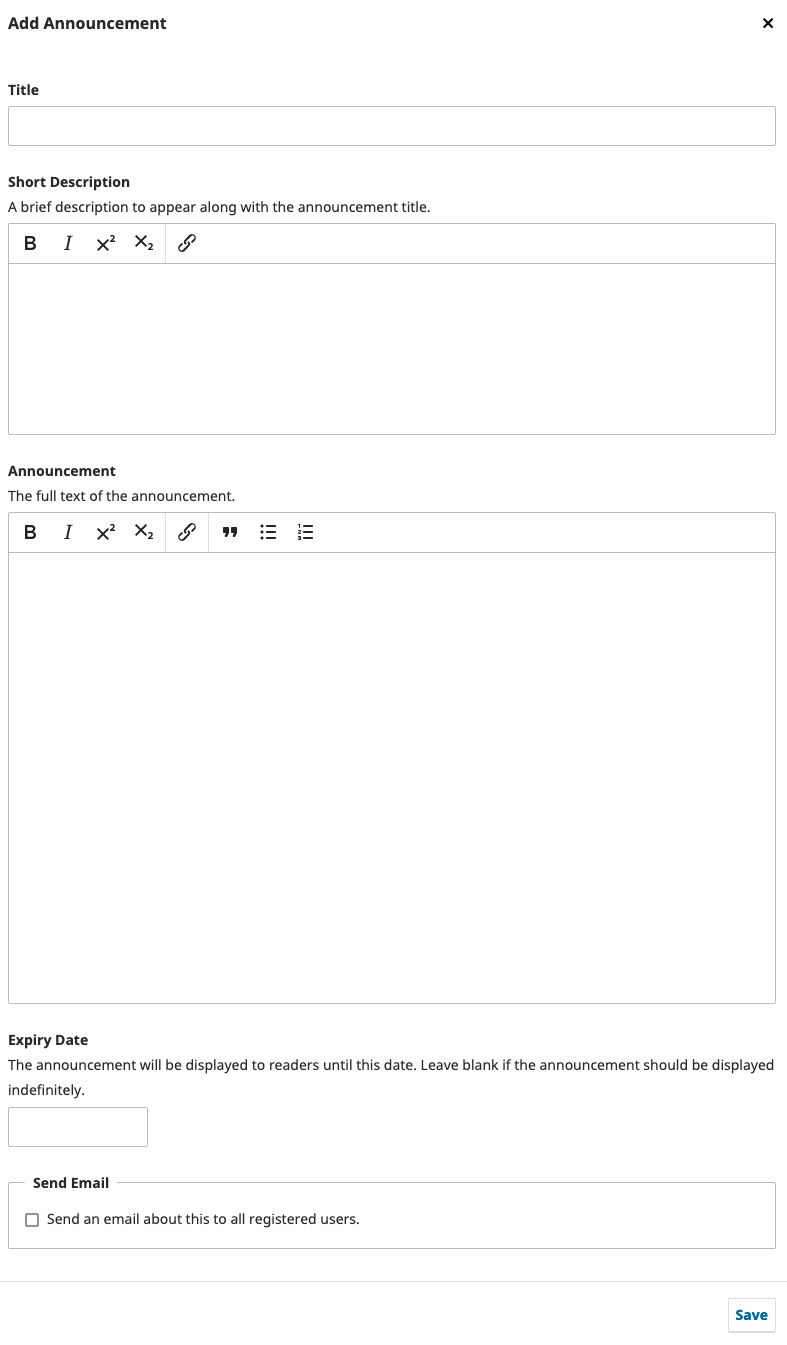
Once the Announcements setting is enabled, click “Save.” An “Announcements” menu item now appears in the main navigation on the left hand side. Click on this menu item and select “Add Announcement.” Here you can include the title of the announcement, a short description and / or full text of the announcement, and an (optional) expiry date.
If you wish to send an email notification to all users (who have not opted out of email notifications), select “Send notification email to all registered users.” Note that this option only works when sending a new announcement. You can edit an announcement you made before, but no email will be sent at this stage if you select the “Send notification” option.
The announcement should now appear on an “Announcements” tab on the public-facing journal site.
This PKP School video explains how to configure the Website settings in OJS. To watch other videos in this series, visit PKP’s YouTube channel.
Limit the number of items (for example, submissions, users, or editing assignments) to show in a list before showing subsequent items on another page. Also, limit the number of links to display to subsequent pages of the list.
Enter the privacy statement you want to appear on your site.
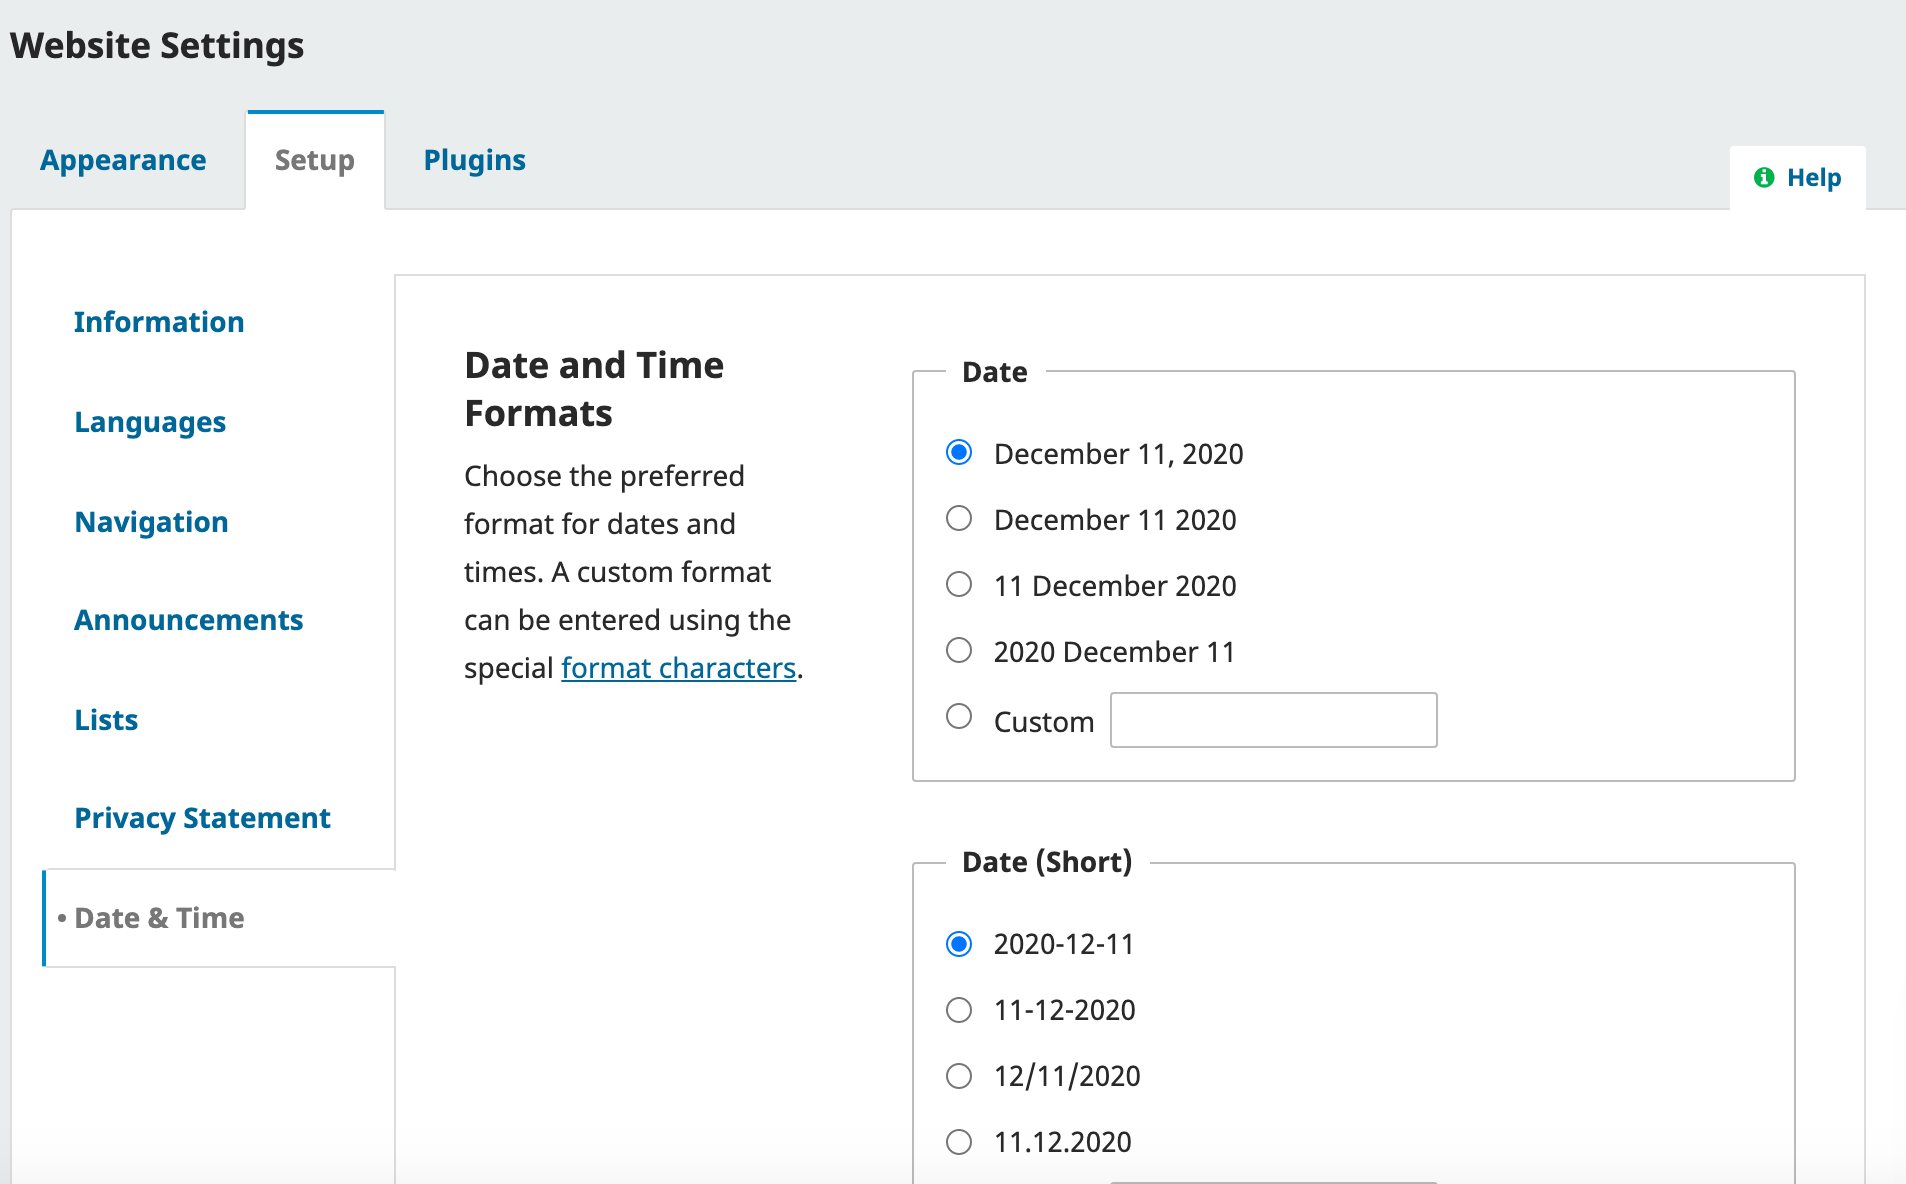
This option allows for the configuration of different format for dates and times for each journal and locale, which could previously only be set up in the ‘config.inc.php’ file. Note that the config.inc.php file can still be used to set the time and format across multiple journals, and the settings for the primary locale will be the default for other locales, unless otherwise configured. A custom format can be entered using the special format characters.
This PKP School video explains how to configure Plugins in OJS. To watch other videos in this series, visit PKP’s YouTube channel.
Use this page to see all of the installed plugins and find new plugins.
To learn more about available plugins, see the Plugin Inventory.
All of the plugins listed here are available in your OJS installation. Check the Enable link to use them.
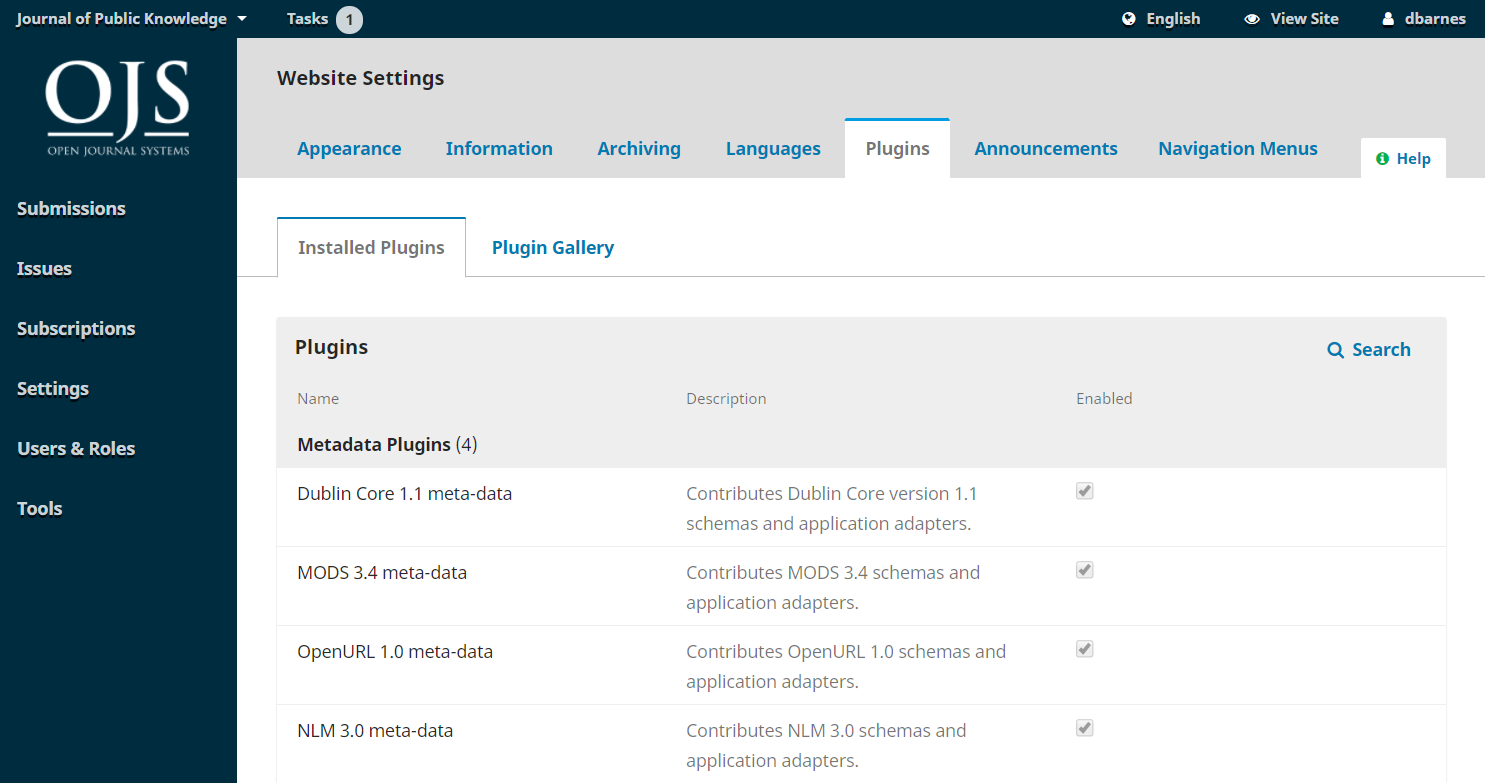
You will notice that some plugins are required for the system and cannot be disabled.
Click the blue arrow next to the plugin name to reveal links to Delete, Upgrade, or Configure settings for the plugin.
The Plugin Gallery provides access to externally-created plugins, that may not be included in your OJS installation, but are available for download and activation. Only an Administrator user can install a new plugin.
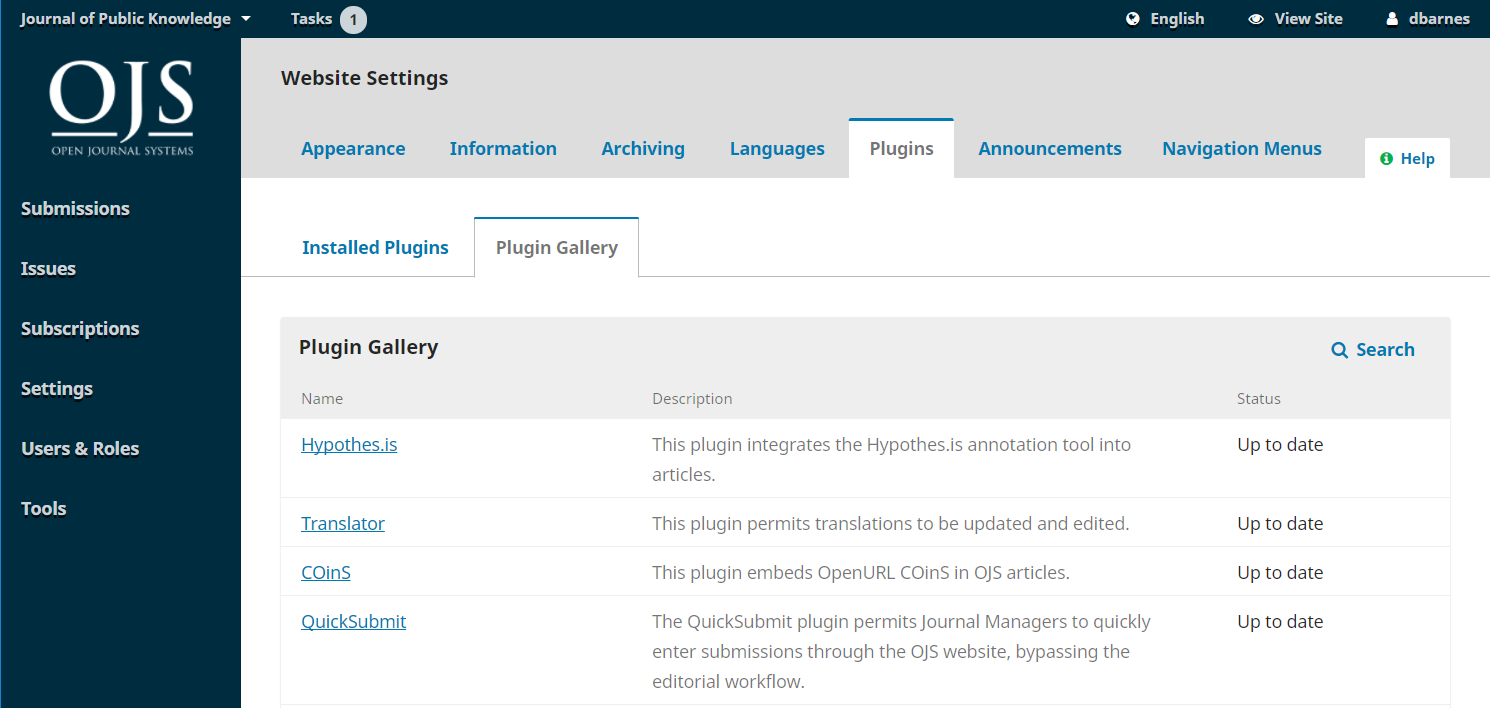
Selecting the plugin title will provide additional details, including the author, status, description, and compatibility.
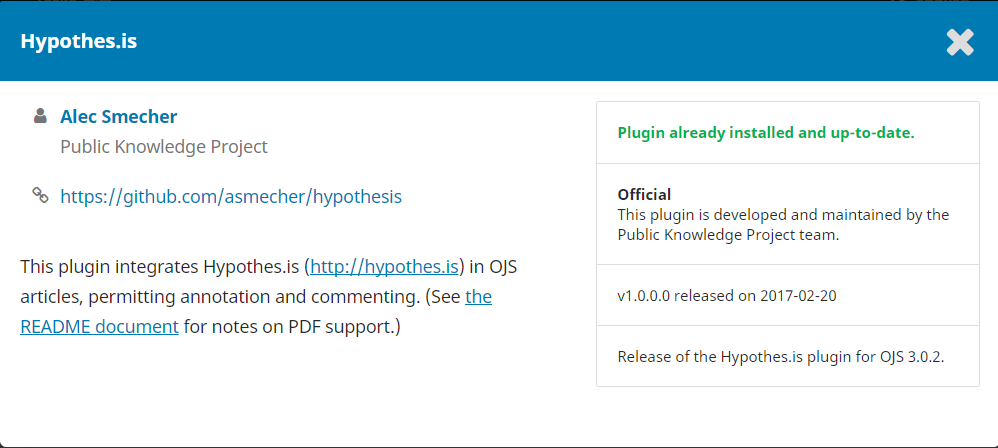
Sometimes new plugins or plugins that are developed by folks outside of PKP will not appear in the Plugin Gallery and you need to install them separately.
If upload fails you may get an error message that says, “The uploaded plugin archive does not contain a folder that corresponds to the plugin name.” Usually this means you have to change the name of the plugin folder inside the zipped folder to a more simple name. For example, change “translator-ojs-3_0_0-0” to “translator.”
Remember to hit Save to record the change.
OJS 3 has a number of plugins that you can enable to help enhance the user experience and discoverability of your content and journal. This section will outline the different plugins available in OJS and how to configure and use them.
As some of the plugins below are 3rd party plugins, it may require that you download the zip file from GitHub and upload it to your journal. For general information on plugins and how to install and enable plugins, please see Learning OJS 3 - Plugins.
Please note that as PKP does not maintain 3rd party plugins, we cannot guarantee that it will work with your version of OJS.
AddThis permits easy social media sharing by integrating tools for several platforms into a compact set of configurable buttons. The plugin integrates AddThis into OJS/OMP for quick sharing of published content.
This plugin can be enabled from the Plugin Gallery.
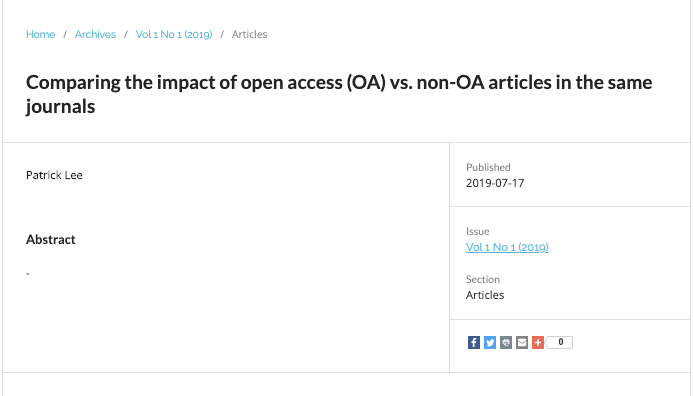
You can configure the social media icons and get statistics by clicking on the Setting button of the Plugin.

In order to get statistics from this plugin, you will need to register for an AddThis account.

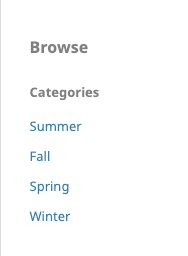
This plugin implements a block plugin that allows the user to navigate content by categories. The browse block appears on the journal’s sidebar.
This plugin can be enabled from the Plugin Gallery.
The Citation Style Language plugin adds a “How to Cite” block to the article page that contains a citation for the article in the format of your choice, with an option below to generate the citation in another format.
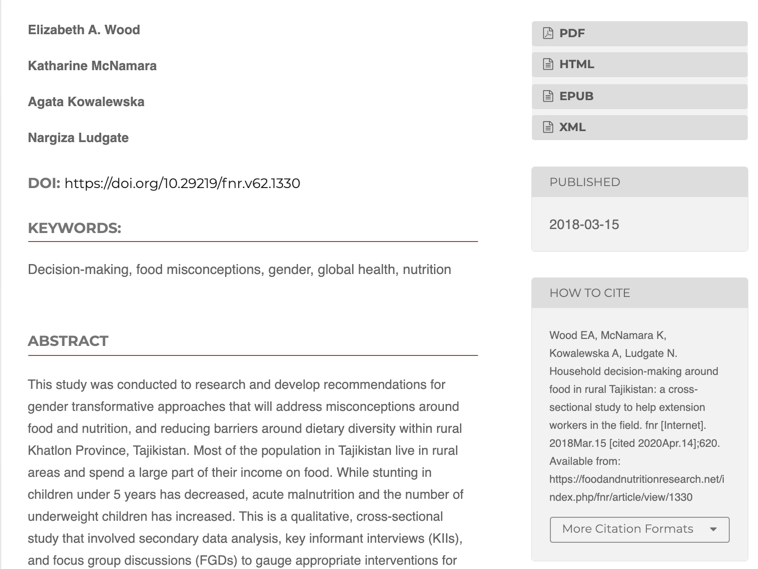
This is an Installed Plugin and will need to be enabled under Website Settings > Plugins > Installed Plugins.
To configure the plugin:

Now the How to Cite block will appear on every article page in your journal.
Please note: The citation style formats are generated by an external library. If you notice an error in a citation format you can file an issue in the Citation Style Language styles repository on GitHub.
You can also add a custom citation style with custom coding.
To configure and add custom blocks:
The Custom Header plugin can be used to add custom JavaScript to a header or block. JavaScript is often required to link your site with outside services but cannot be added directly to a field for security reasons.
The plugin can be installed from the Plugin Gallery.
Example: Use the Custom Header plugin to add a Twitter feed to your sidebar
You can add a Twitter feed for your journal, press, or organization to the sidebar of OJS or OMP.
First, you need to enable and configure the Custom Header plugin, which allows you to add JavaScript code to a custom block:
<script async src="https://platform.twitter.com/widgets.js" charset="utf-8"></script>
Next, you need to create a custom block:
<a class="twitter-timeline" href="https://twitter.com/asmecher?ref_src=twsrc%5Etfw">Tweets by asmecher</a>
<a class="twitter-timeline" "data-tweet-limit="3" ...
Finally, you have to add the custom block you just created to your sidebar.
Another option is to use the Twitter sidebar plugin. This plugin makes Twitter block for the sidebar.
The Disqus plugin integrates with Disqus and allows users to add comments to the article pages.
The Disqus plugin is a third-party plugin and must be installed from its Github repository.
After you install and enable the plugin, you must register for a Disqus account on the Disqus website. When you register, choose the option to use Disqus on your website. Disqus offers free and paid plans and you must choose a plan when you register.
When asked to register your Website Name, create a name based on your journal name. This will show up in Disqus feeds, email notifications, and your Community tab. For example, “pkpworkshopsjournal.”
Skip the Install Disqus step and go to Configure Disqus. Enter your journal url in the Website URL field. Enter your comments policy as applicable.
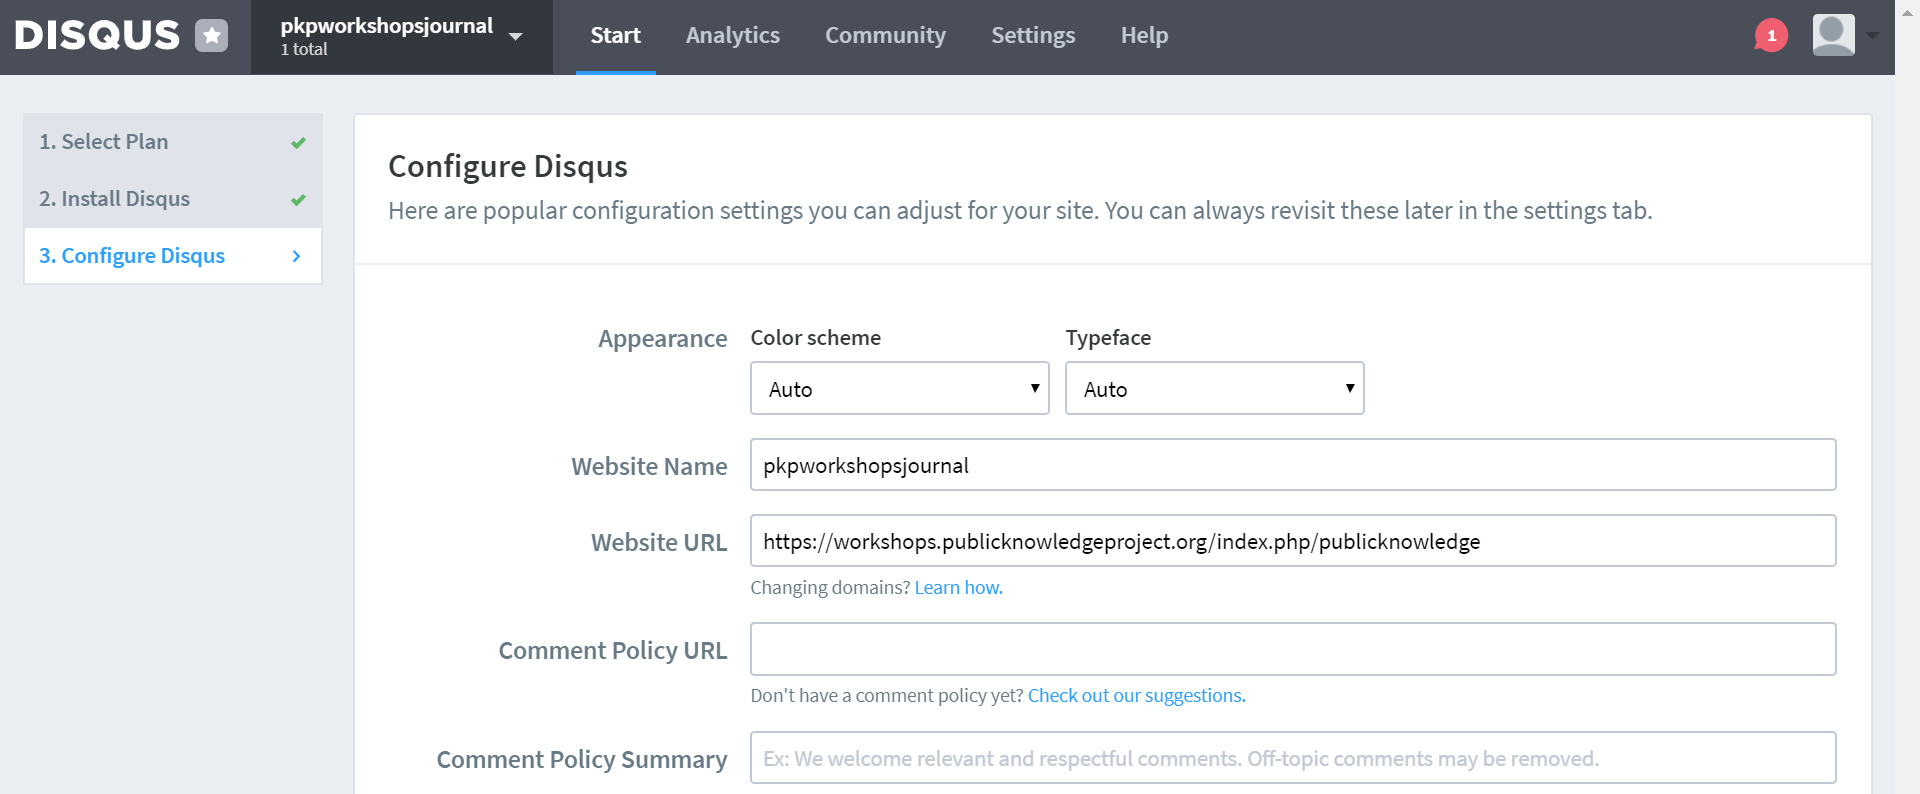
Now you can configure the Disqus plugin on your journal site:
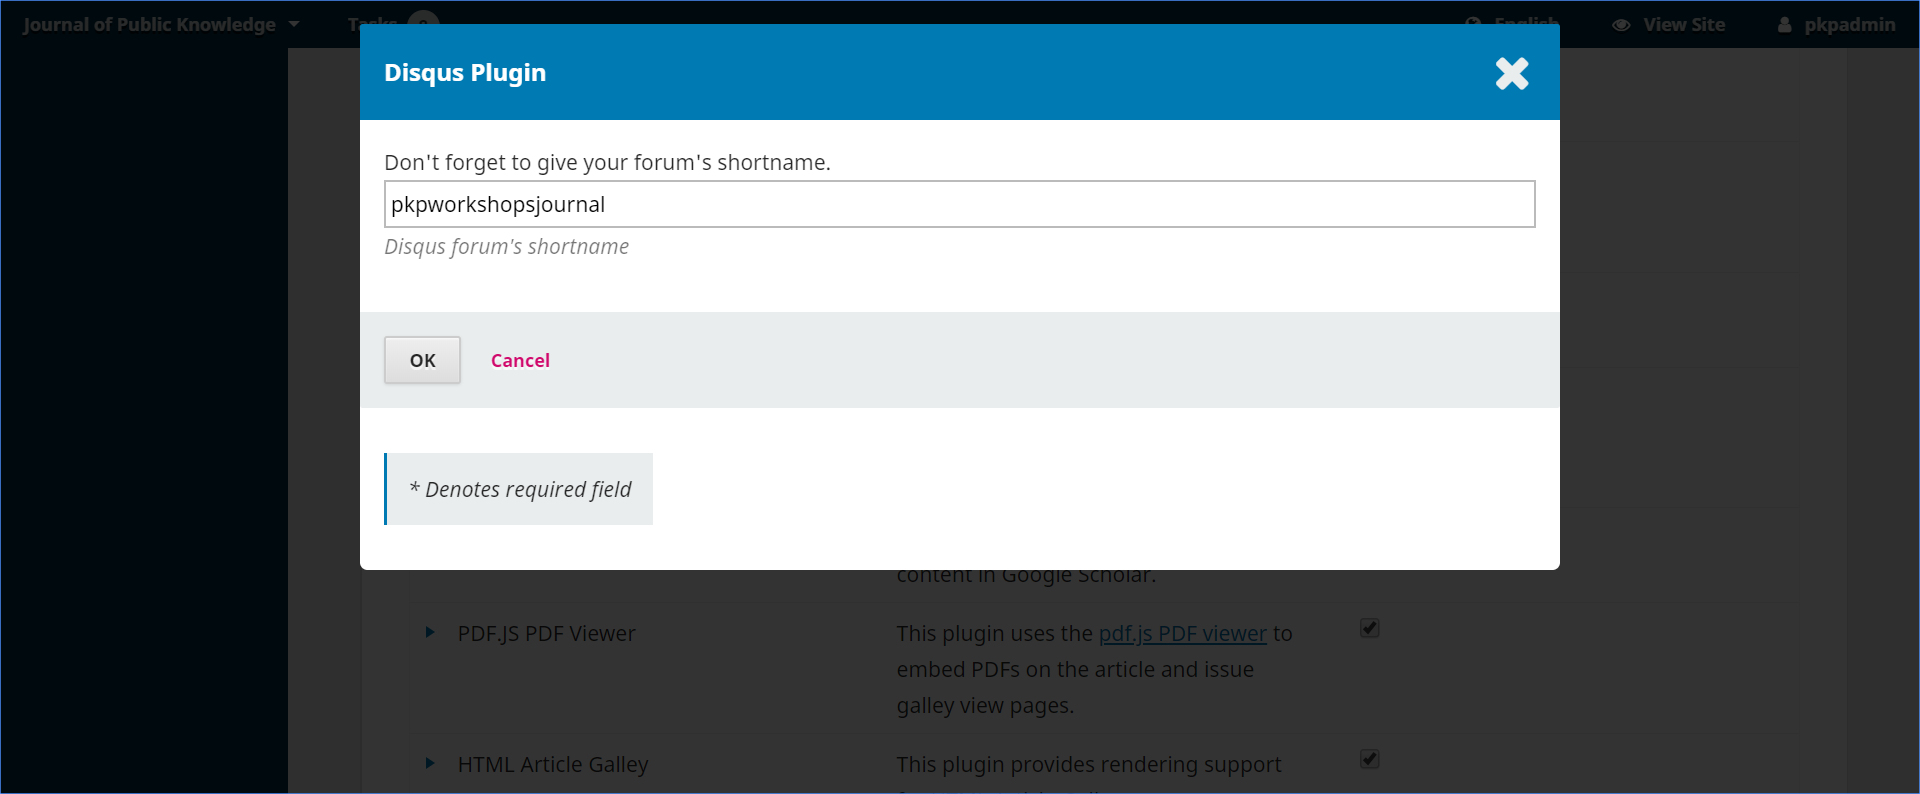
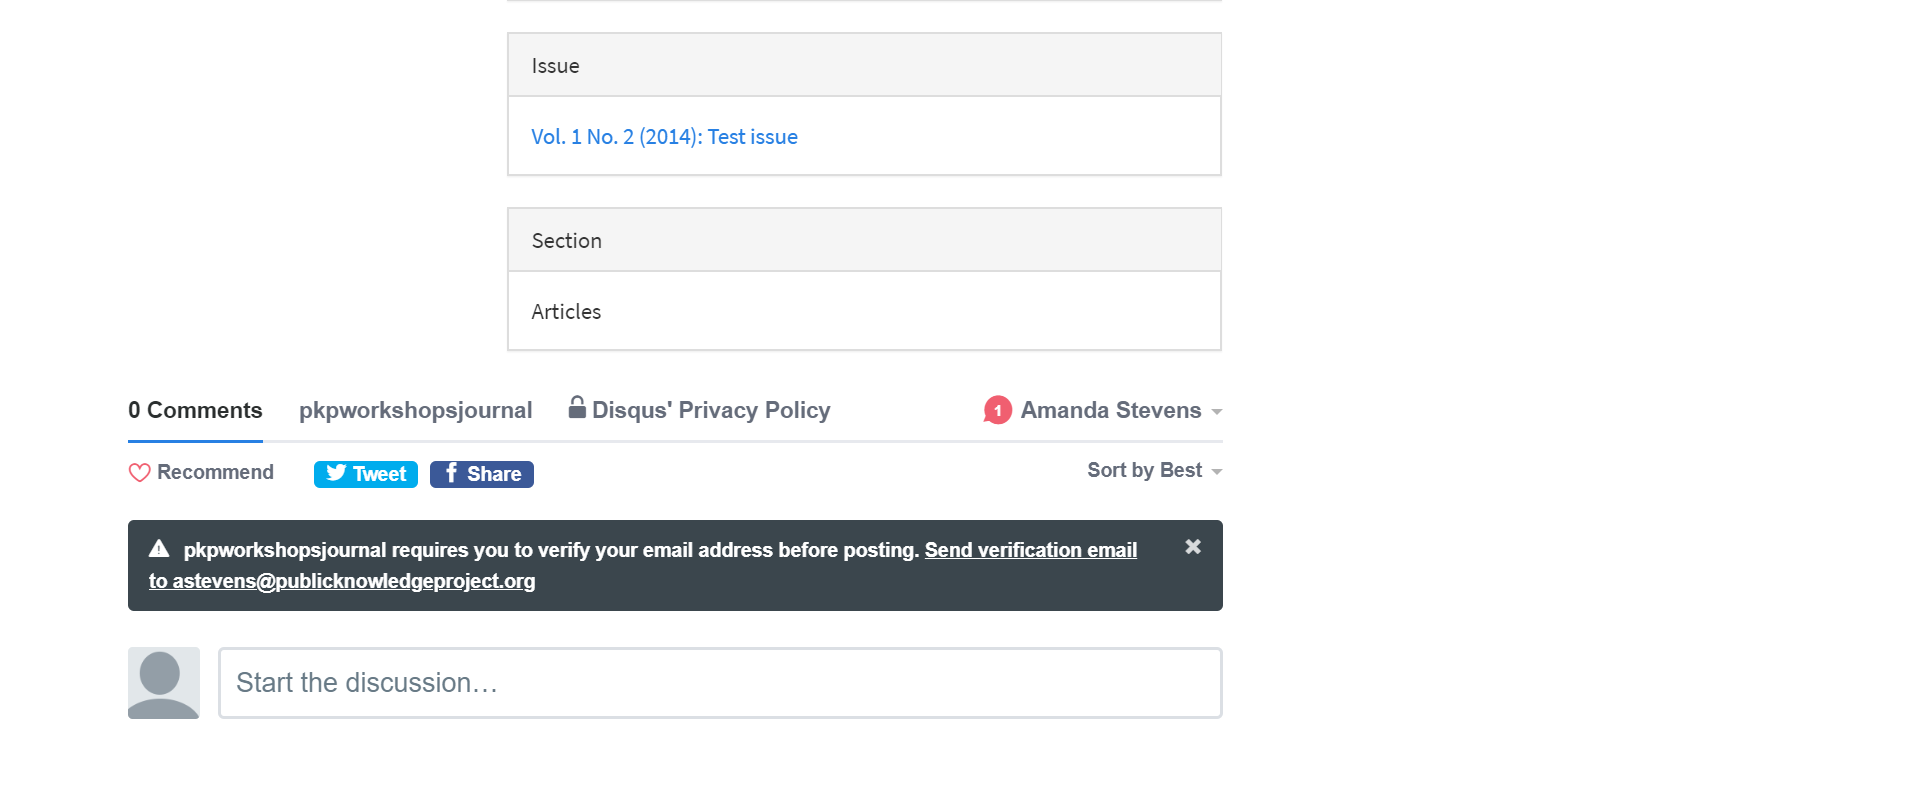
After configuring the plugin, if you open one of your article pages, you should see Disqus comments at the bottom. Your users will have to register with Disqus to use the feature.
This plugin adds Hypothes.is integration to the public article view of OJS, permitting annotation and commenting. It currently supports commenting on HTML galleys.
This plugin can be enabled from the Plugin Gallery.
Once enabled, readers will see the hypothes.is tools on the right side of the HTML galley.

You will need a free hypothes.is account in order to participate in public commenting. Specific/Private commenting groups can also be set up. See hypothes.is for instructions.
Public annotations and highlights will be visible (if any) once you are signed in.

This plugin displays a tag cloud of keywords that can be enabled on the sidebar of your journal or press.

This is a 3rd party plugin that will need to be downloaded from GitHub.
Once you’ve downloaded the file from GitHub, upload it to your journal and enable it. This will make the keyword cloud available as a block that you can add to the sidebar of your journal.
To add the keyword cloud display to your sidebar:
The cloud will should now appear on the sidebar of your journal site.
This plugin creates a “most read articles” section in the journal’s sidebar with the 5 most viewed articles (with links) in the last week, along with the number of views per article.
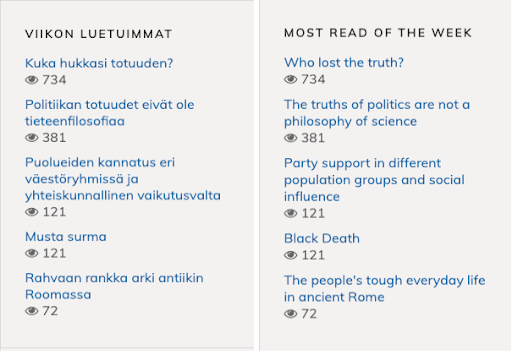
This is a 3rd party plugin and the file will need to be downloaded from GitHub.
This plugin is compatible with OJS version 3.1.2 or higher. It is currently being adapted for OJS 3.2.
Once you’ve downloaded the file from GitHub, upload it to your Journal and enable it. This will create a “Most Read” block that you can add to the sidebar of your journal.
To add the Most Read block to your sidebar:
The block will now appear on the sidebar of your journal site.
This plugin inserts a list of articles by the same author (with appropriate links) on an article’s abstract page.

This plugin can be enabled in the Plugin Gallery.
Once it has been enabled, there is no additional configuration required.
This plugin inserts a list of similar articles to the article abstract page.
This plugin can be enabled in the Plugin Gallery.
Once it has been enabled, there is no additional configuration required.
This plugin displays the number of downloads of an article on the article page.
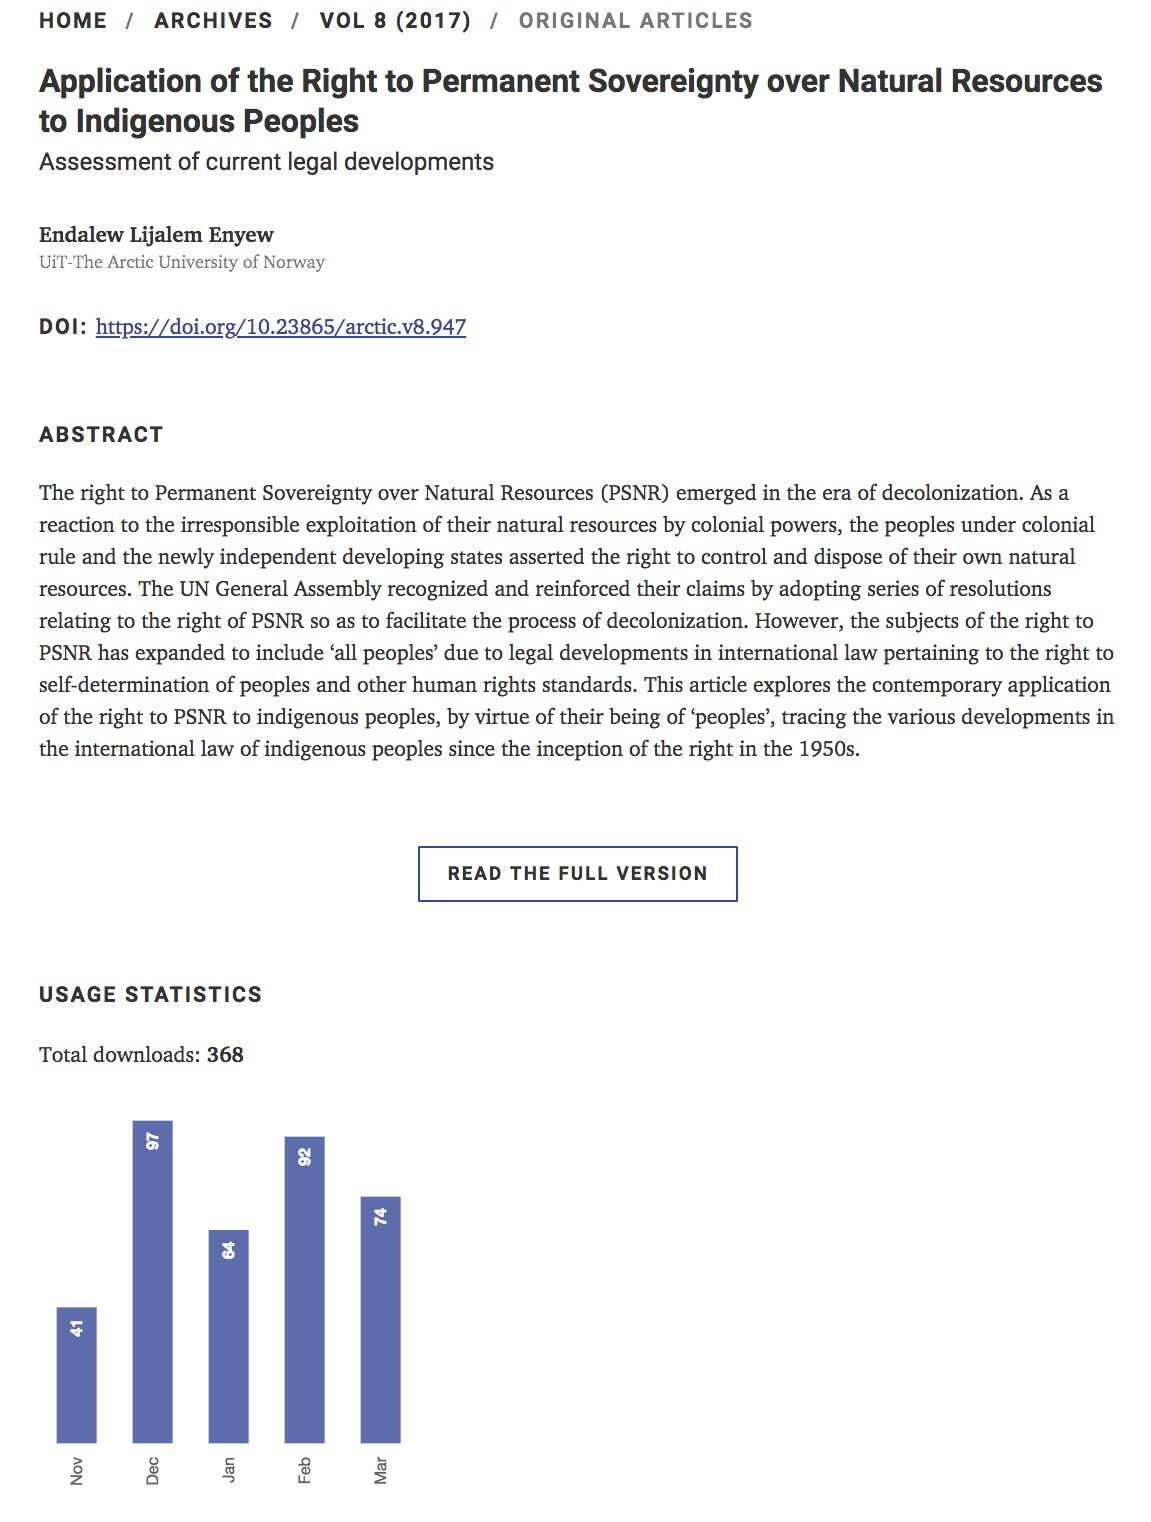
To configure the Usage Statistics Plugin, you must be an Administrator:

Please note that: