
This section provides access to all of the user accounts associated with your journal, as well as the opportunity to manage roles and permissions.
In addition to managing the journal web site, the Journal Manager is also responsible for all of the user accounts in the system.
To view the user accounts, select Users & Roles from the left menu.
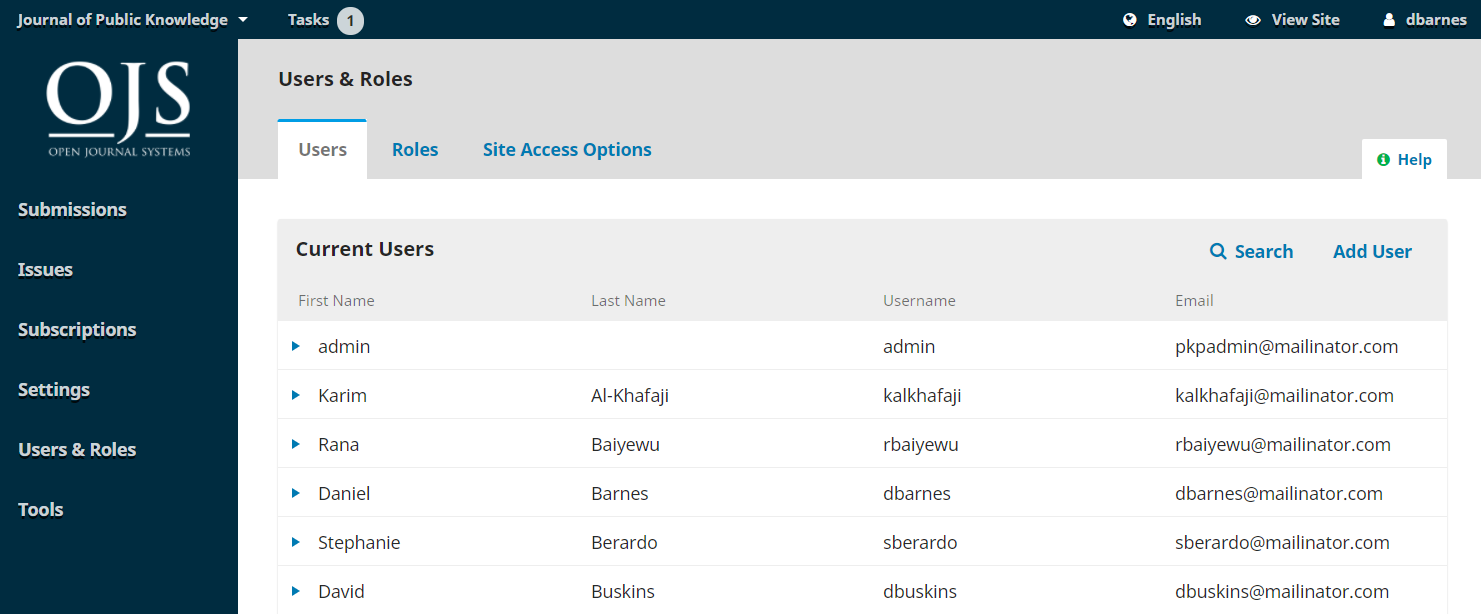
Users are displayed in last name order.
You can edit a user account by selecting the blue arrow to the left of an entry.

This opens the options to Email, Edit User, Disable, Remove, Login As, Merge User.
If you want to email a user about a particular submission, you can use the Discussion feature in the submission. This keeps all communication about a submission in one place.
To send an email to a user that is unrelated to a submission:
![Email pop-up box for emailing a user]](/learning-ojs/3.1/en/assets/learning-ojs-3-users-email.png)
You cannot email multiple users at the same time except by using the Announcements feature. See the Workflow Settings chapter for instructions on how to send announcements. It is also not possible to send a message to all users in one role, such as all reviewers registered on your site.
If you want to email multiple users or all users in a single role on a regular basis, you can use an external email marketing application such as Mailchimp. User records can be exported in XML using Tools > Import/Export > Users XML Plugin or an Administrator can export them from the database in CSV.
It is not currently possible to add cc or bcc addresses to messages or to add attachments to messages. To send attachments you can instead use the Discussion feature or the Submission Library.
Edit User allows you to make changes to that user’s account.
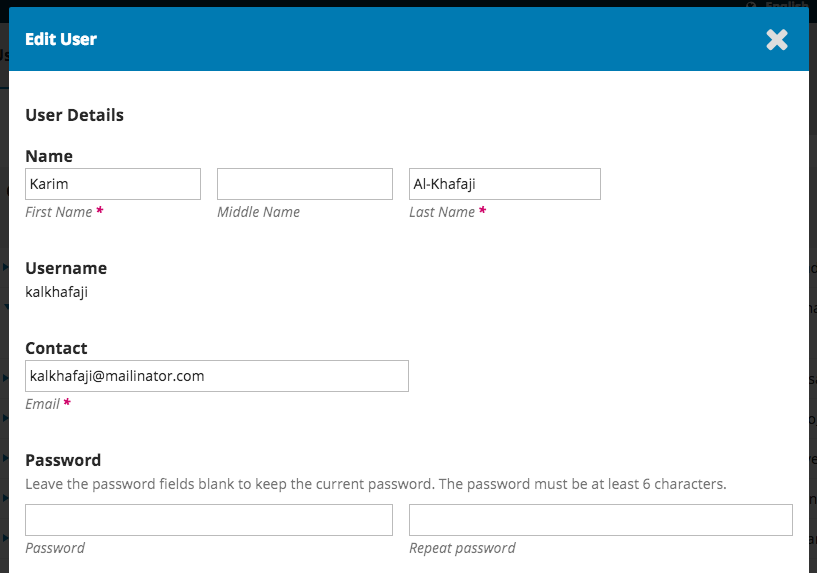
Disable keeps the account in place, but blocks the user from accessing it.
Remove un-enrolls the user from all roles in the journal, but the user account remains in the system. The only way to actually remove a user account from your system is to Merge Users (see below).
Login As allows you to temporarily log in as that user, for example, to complete an outstanding task.
Merge User lets you fold this user account, including any submissions or assignments, into another user account on your system.
Note: This is the only way to completely delete an account from the system.
You may want to create a dummy user account (e.g., Deleted Users), and use that to merge unwanted accounts into.
To merge users:
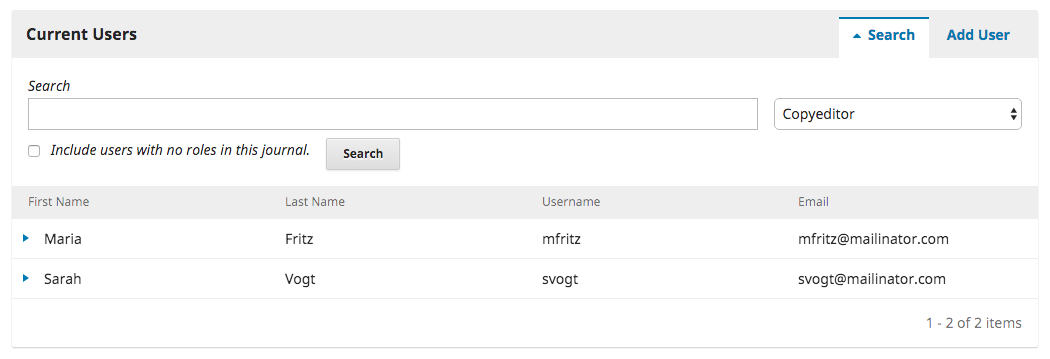
When you have a large number of users, you will want to take advantage of the search feature.

This can help you quickly find a user by first name, last name, or email address, or to see all users in a particular role.
Note: If you leave the Search field blank, select a Role, and hit Search, you will get a list of all users in that role (e.g., all copyeditors).
To add a new user to your journal, select the Add User link. This will open a new window with a set of fields to fill in.
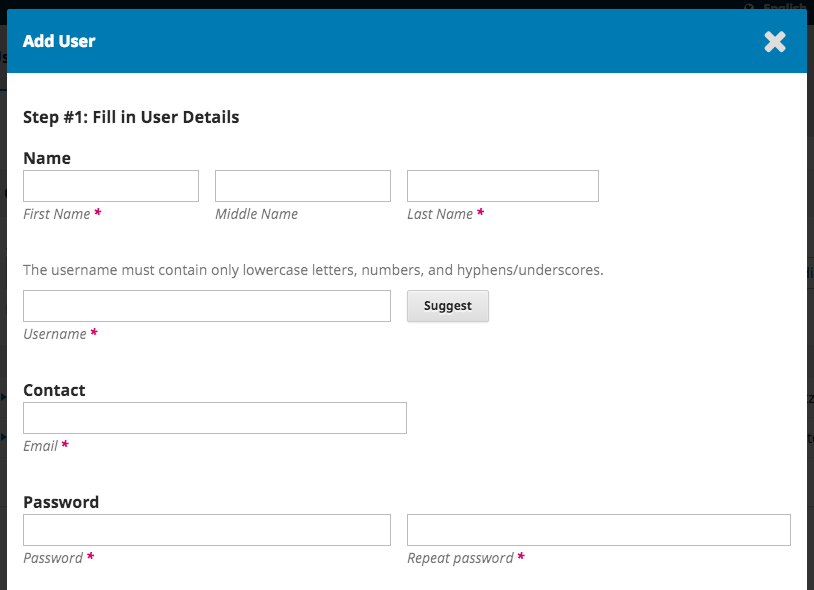
Once these fields are completed and you hit Save, you will then be asked to assign roles to the new account. Use the Add Role link to open the role selector.
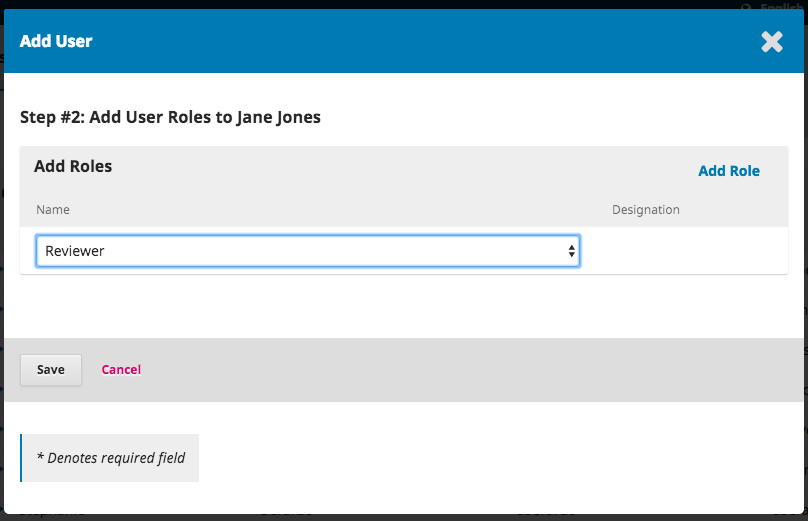
Once you have added all of the roles, hit the Save button.
On multi-journal installations, an Administrator can register a user from Journal A as a user on Journal B.
If a user can’t log in to your journal site, tell them to select Forgot your password on the Login page. They will then receive a reset password link by email and will be able to reset their password.
If the user has further issues, a Journal Manager or Editor can do the following:
If the user still cannot log in, their account may have been disabled. To re-enable it:
Users in the system must have one or more roles.
Roles define what a user can do within the system. An Author can make submissions and little else. An Editor can manage submissions, and a Journal Manager can configure the journal’s settings. See the User Accounts chapter for a list and description of every role.
One user can have more than one role, for example, being a Journal Manager, Editor, and Author in the same journal.
OJS 3 has multiple roles available, each with different permission levels.
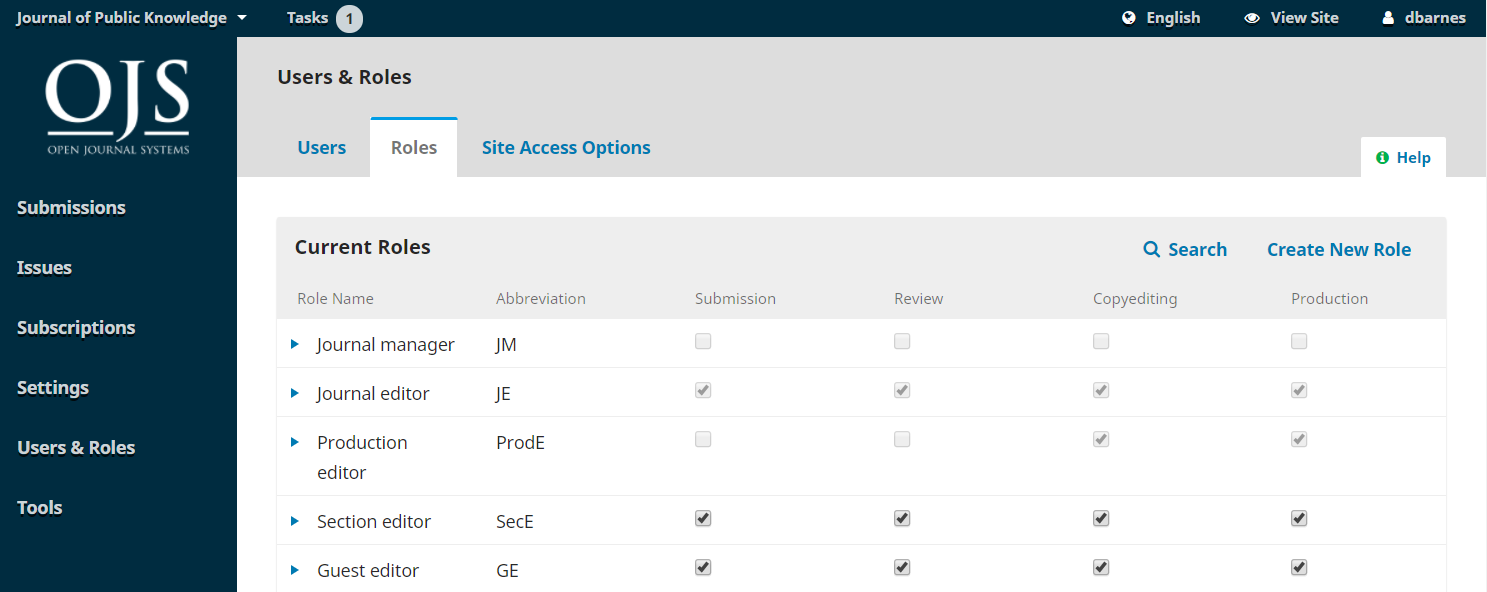
From this page, you can see each role, and the editorial stage each role can access. A good example of this is the Copyeditor role, which can only access the copyediting stage. Copyeditors cannot jump to the Review stage to see what happened during the peer review process. See the Editorial Workflow chapter for more information about the different editorial stages.
Unchecking a box removes access to that stage for users with that role.
Selecting the blue arrow to the left of the role name reveals the edit link. Clicking this opens the editing window.
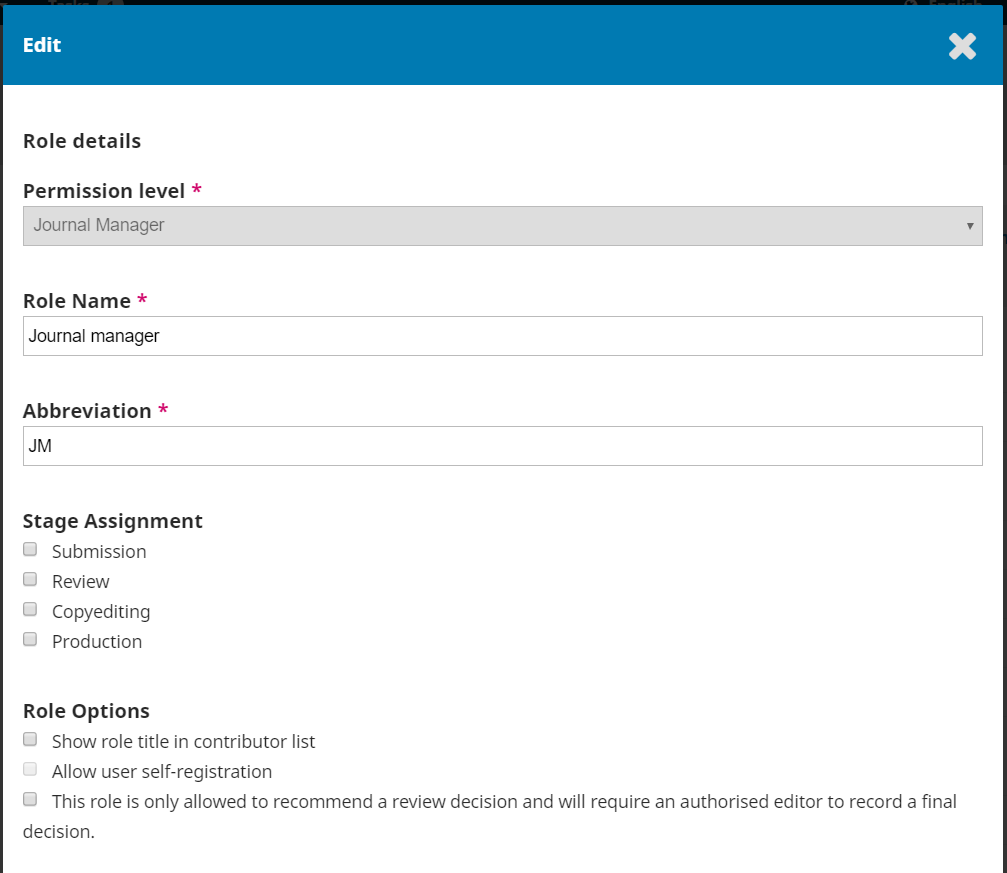
Permission Level: This indicates how much a user with this role can do in any stage.
The Journal Assistant level can communicate with other users and upload and revise files. In Journals where only one user has been assigned with an Assistant role, they will be automatically assigned to a new submission. Once a second person has been assigned this role, this action will stop.
Role Name: You can use this field to easily rename any role.
Abbreviation: Each role must have a unique abbreviation.
Stage Assignment: This allows you to determine which stage users with this role can access.
Role Options: Use these checkboxes to show anyone with this role in the contributor list (e.g., the author list).
Use the second option to determine whether users can self-register in this role. Authors and Reviewers are good candidates for self-registration. You would definitely NOT want to allow users to self-register as Journal Managers or Editors!
The third option is useful for guest editors or possibly section editors, depending upon your preferred workflow and authority chain.
Use the Create New Roles link to open a window where you can create a new role for your journal, including setting which stages it can access and how much permission it should have.
This page allows you to determine how readers can access your journal.
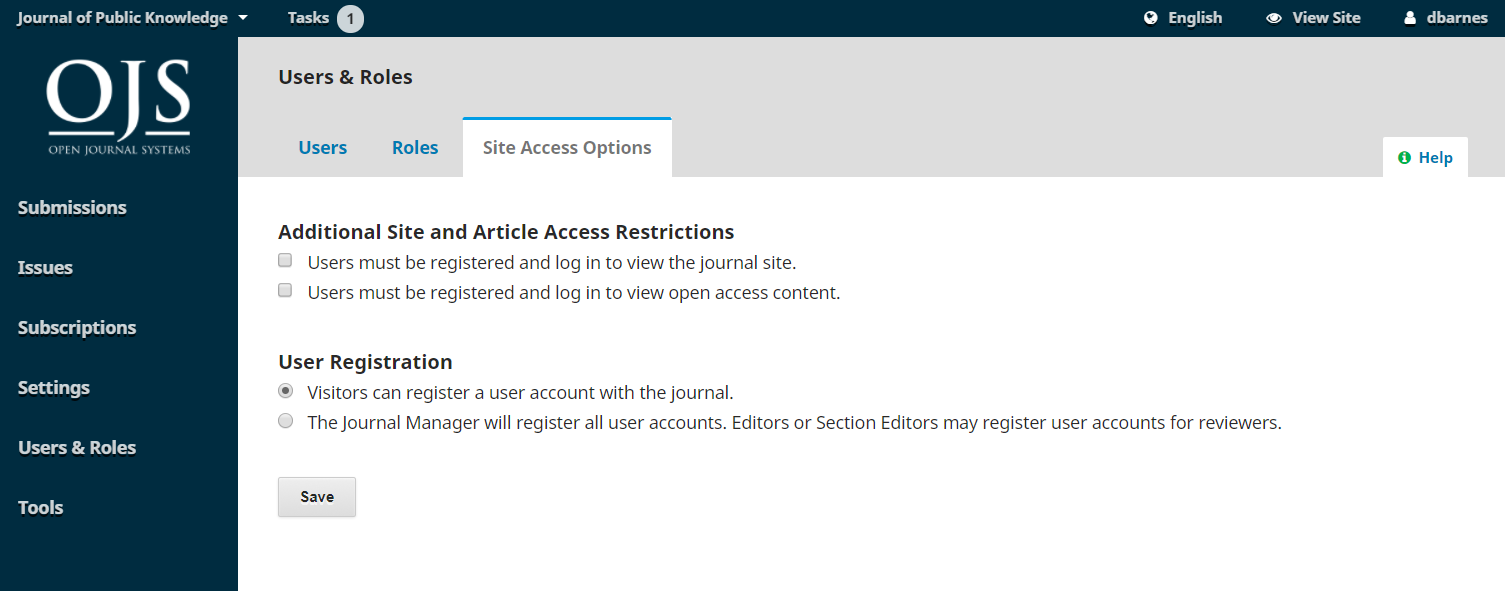
Additional Site and Article Access Restrictions: Choose from these options to limit access.
Keep in mind that while requiring registration to read open access content can be convenient for your tracking, it can dissuade some people from reading your content. Use with care.
User Registration: This option allows you to determine whether users can create their own accounts or must be enrolled by a Journal Manager.
Allowing users to register themselves, but only into Author, Reviewer, or Reader roles, is a good choice.