Most of PKP’s documentation is hosted and managed in a GitHub repository called the PKP Documentation Hub and is built using an open-source tool called Jekyll. GitHub is a collaborative version control system that manages and stores revisions of a project. To learn more about GitHub and Git, watch this “What Is Git and Github?” video or this “Git and Github for Poets” video.
The content files that make up PKP’s documentation are stored in the Documentation Hub repository and anyone with a GitHub account can edit and add documents to the repository. This chapter explains the important things you will need to know when working on GitHub.
If you don’t have a GitHub account already, begin by creating an account.
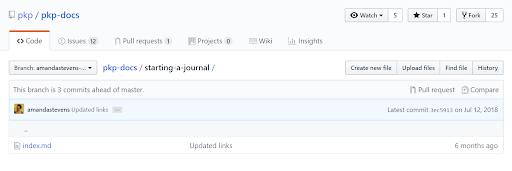
Each folder in the PKP Documentation Hub repository represents a document.
Short documents consist of a single markdown file and may have an “assets” folder of images. All content is contained in the index.md file and the table of contents on the side of the page is created using the header tags in markdown.
Longer documents consist of multiple chapter files, a README file, a SUMMARY file, and an assets folder. Content is stored in the chapter files and the README file acts as a summary page for the document. The SUMMARY file creates the table of contents.
All files created will need to have a .md ending
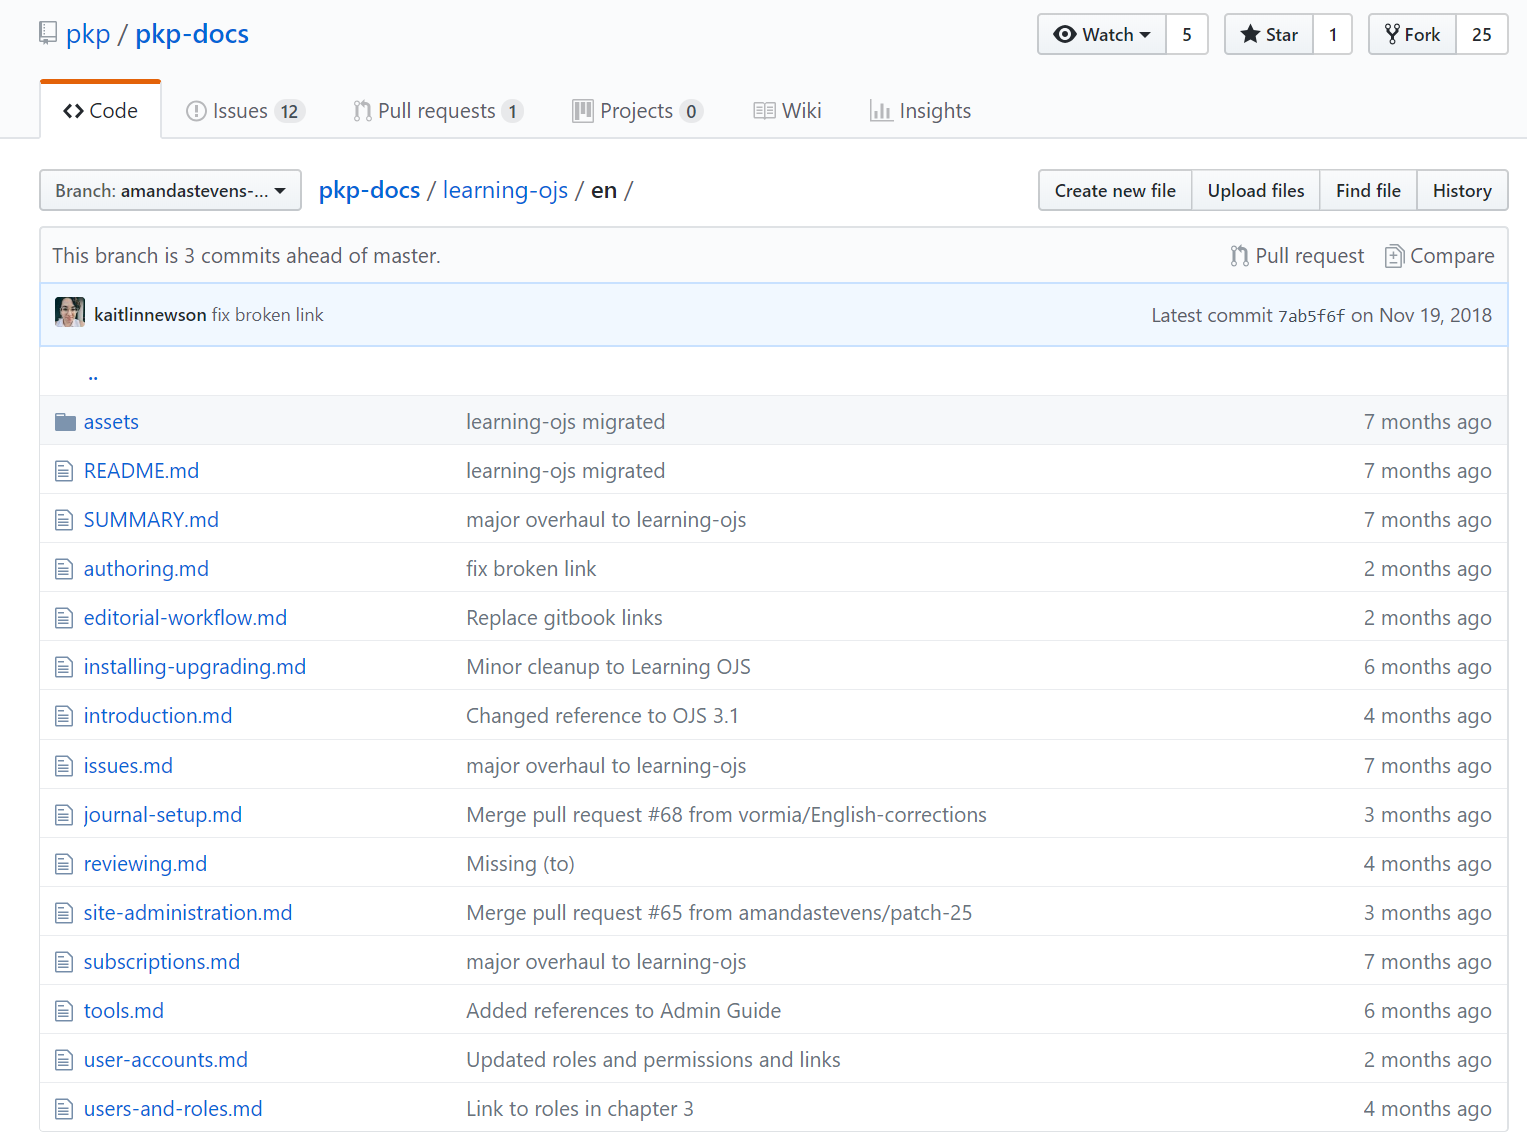
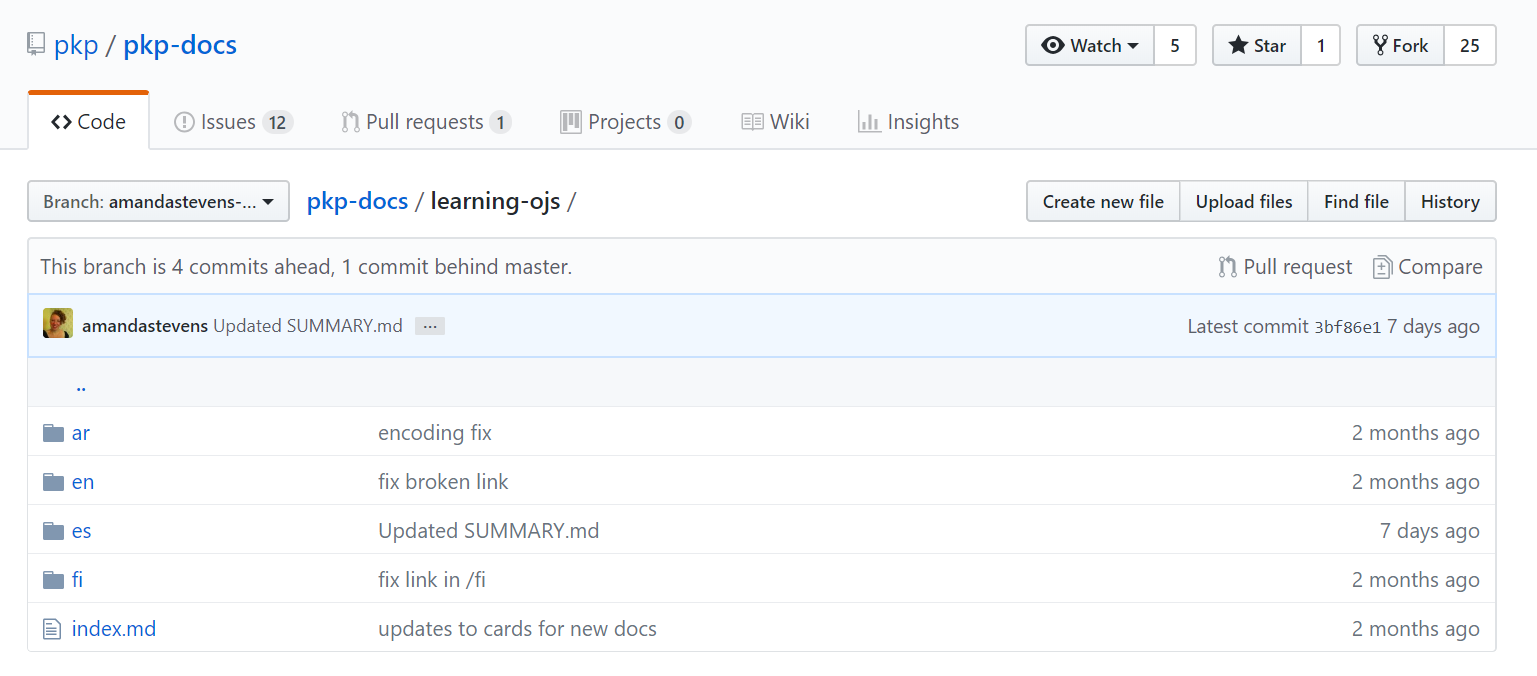
If the document exists (or will exist) in more than one language, there will be a separate folder of these files for each language version.
The README.md file should include a brief introduction regarding the document, a list of contributors, and a release date.
A branch is a version of the repository that contains the changes you’ve proposed, uniquely. Since it is not part of “main”, it won’t have an impact on the way the site is built in real-time.
As most users will not have direct access to make changes to the PKP repository, they will need to create a branch to make changes. If you do not have full permission you will come across the message box that says: “You’re editing a file in a project you don’t have write access to. Submitting a change to this file will write it to a new branch in your fork, so you can send a pull request”.

A branch can be created on your own repository or automatically generated when you try to make a change on the PKP repository.
In General While any name you create should work, it’s best to keep titles short and descriptive. Always replace spaces between words with a dash.
Titles: Some example titles include: learning-ojs, pkp-theming-guide, crossref-ojs-manual. Remember that titles are part of the file path in the URL to individual docs so keep it simple.
Chapters: You might be tempted to number chapters, but if we ever need to create new chapters in between existing ones, we would need to re-number. It’s best to keep chapters in the same style as title-level names. Some examples for chapters include: getting-started.md, troubleshooting.md, data-import-and-export.md.
Images: Store all images in a single “assets” folder within the language you’re working (e.g.: en/assets/). Keep your image titles brief or with abbreviations and consistently named, so they’re easy to locate. Depending on how many images you have, numbering these might be a lot more convenient while working on the document. Listen to your heart. Some examples include: contrib-01.png, authoring-images-01.png. If you’re putting all your images into only the asset folder, it’s a good idea to name your images to correspond with chapter titles.
Note that file names are case sensitive, so if the image is saved as learning-ojs3.1-jm-settings-workflow-email-templates.png and you reference learning-ojs3.1-jm-settings-workflow-email-templates.png in the document, the image will not display.
The files are all in a format called Markdown, a simple, easy-to-read, easy-to-write text format that allows users to generate basic HTML without knowing HTML itself. It uses simple tags to format text on a website.
This is an example of markdown:
## The "Documentation Hub"

### Single Page Docs
Here are three guides for writing markdown:
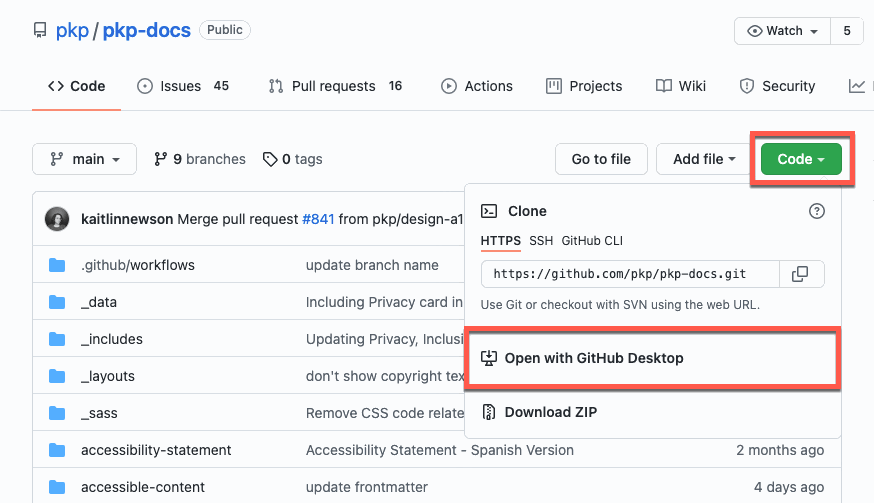
If you’re working on a large piece of documentation and you’re not comfortable using either the command line or the web interface for GitHub, consider using GitHub Desktop and the Atom text editor. With this workflow, you can “clone” a copy of the docs repository to your computer, make your edits locally (and even build a version of the Documentation Hub using Ruby, if you like) and create a pull request with your changes once you’re finished.
Once you’ve installed GitHub desktop, you should have an option while viewing any GitHub repository to “Code” and “Open with GitHub Desktop”.
You’ll be prompted to choose a download location for your copy of the repository. If you’re happy with the default, click the blue “Clone” button.
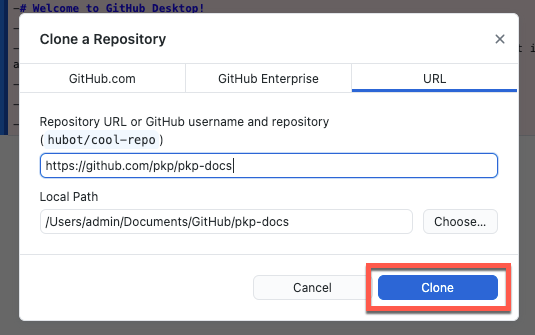
It’ll take a few minutes for all the files to download.
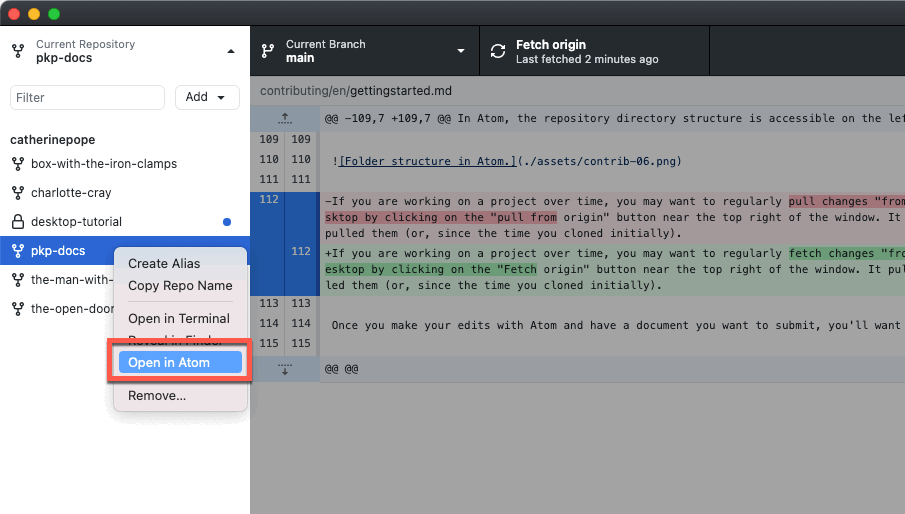
GitHub desktop manages your commits and pull-requests locally. It’s especially convenient if you’re changing more than one file at once. If you have Atom installed, you can open your project with the editor directly from GitHub Desktop.
In Atom, the repository directory structure is accessible on the left-hand side in the “project window.” Clicking on any title opens it in the editor and allow you to make changes. You’ll notice the colors of the filenames change as you work. Green indicates a new file you’ve added. Yellow indicates a file you’ve changed since the last time you pulled an update from the primary repository.
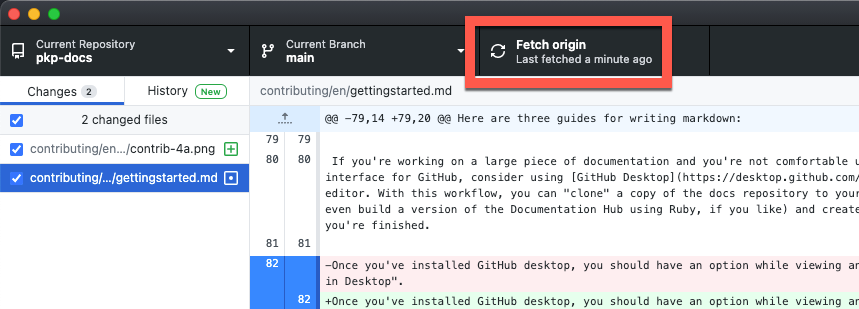
If you are working on a project over time, you may want to regularly pull changes “from origin.” You can do this in GitHub desktop by clicking the “Fetch origin” button at the top of the window. It pulls changes since the last time you pulled them (or, since the time you cloned initially).
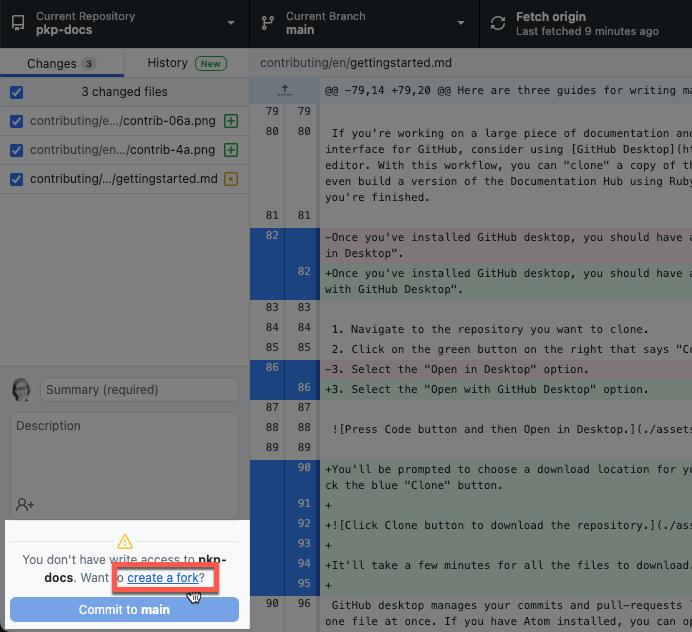
Make sure you’ve saved your changes in Atom. Then you’ll see a list of your changed files in GitHub Desktop. A green plus sign indicates a file you’re adding; an orange dot denotes a file you’ve modified.
In the bottom left-hand corner, you’ll see a warning that you don’t have write access to pkp-docs. GitHub Desktop invites you to create a fork by clicking on the hyperlink.
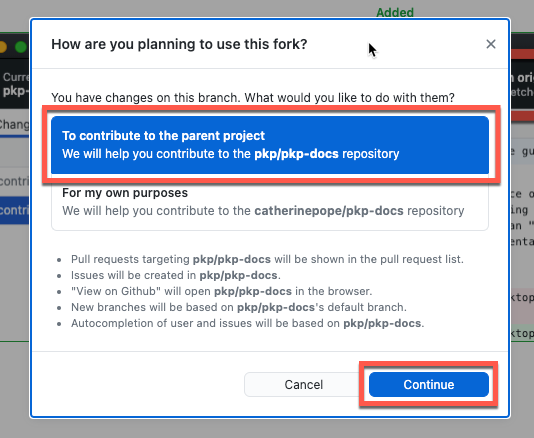
On the popup message, click the Fork this Repository button. GitHub then asks how you’re planning to use this repository. Choose To contribute to the parent project and then click the blue Continue button.
Once you’ve finished making your edits with Atom and have a document you want to submit, you’ll need to contribute it back as a “branch.”
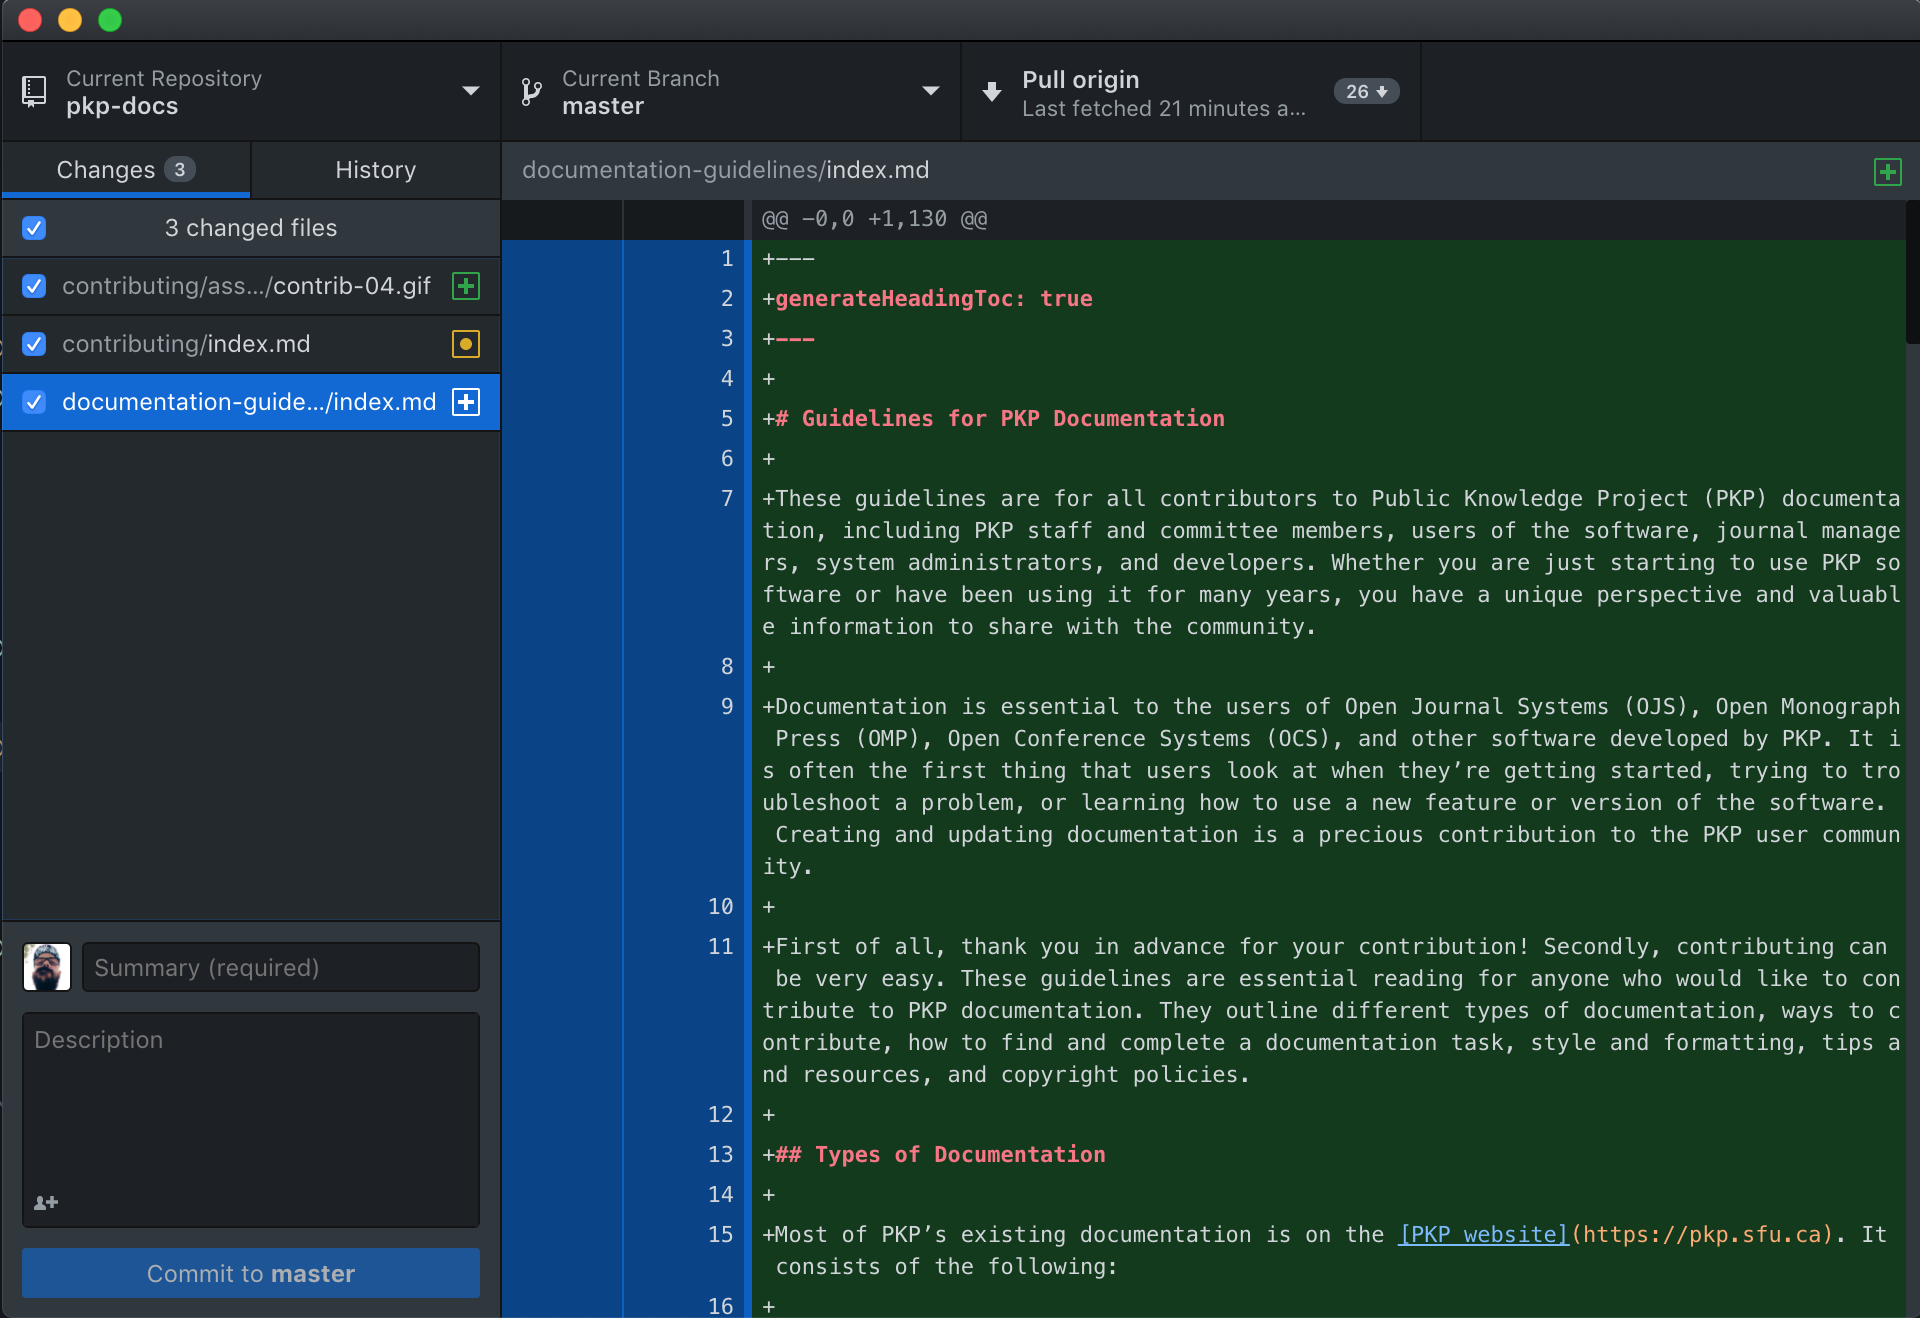
Now that you’ve made your edits/additions and created your branch, you can commit your code. On the left side of your GitHub Desktop window, you should see all the files you’re adding or changing and, at the bottom, a commit option.
The Summary field is for a very short descriptor of what you just changed. A few words should do the trick. Here are some examples:
filename.mdfilename.mdThe second field is for a more detailed description of what you changed. You might want to do this if you need to justify your changes or need to let everyone else know that a change is significant.
When you finish, click the button on the bottom left labelled “Commit to branch name.”
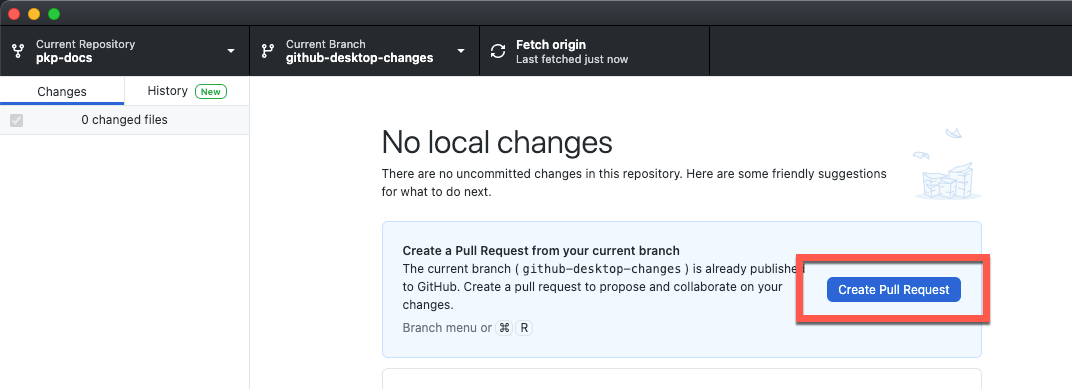
Now you’ve committed your changes, you can push your changes back to the repository with the blue button on the top right. It should say “Publish branch” if it’s the first time you’ve committed that branch. Once your branch has synced, you’ll see a blue “Create Pull Request” button so you can submit your changes to the managers of the Docs Hub.
This document is, necessarily, a brief introduction to using GitHub. GitHub has a tremendous amount of documentation on its use, however. If you want to read more about GitHub basics, read “Hello, World”.
We encourage users and community members to write and edit documentation in markdown and contribute through GitHub. However, contributed documentation can be created or edited in any format you want to work in, including a .doc or .odt text document, a Google doc, or an email, and the DIG will convert the documentation to markdown. Do not contribute documentation in PDF, HTML, or LaTeX format.
Some contributors prefer to create or edit documentation in a Word, Open Document, Google Doc, or another format. If you’re creating documentation with a group of people, it can be easier to use a Google Doc than GitHub.
If you have created documentation in one of these other formats, you can email the file as an attachment or link to a shared document to documentation@publicknowledgeproject.org. If you created documentation as a Google doc, you should send the link in an email message.
If you are editing an existing document, try to make it as clear as possible what you have changed.